
vue 支付密码组件
我们要做一个类似京东、支付宝支付时的6位密码组件,效果如下。
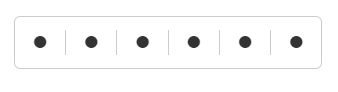
专门为PC端写的。移动端的很多框架基本都已经有了,而且实现逻辑会比pc简单,因为是移动端一般配单独键盘,甚至不需要input框,不用考虑鼠标,所以对焦点的处理会简单一些。而且移动端没有password autocomplete 的烦心事。
pc 端如果使用 input password 组件的话(参考文章:https://www.jianshu.com/p/03d2a4744258 ),chrome无论怎样都会弹出密码管理窗口。如使用autocomplete=new-password虽然不会自动填充,但还是会弹出密码管理窗口。所以我们使用input text/tel 组件,然后用•或*给盖住。
Vue 整体代码如下:
1<template>
2  <div :id="`ids_${id}`" class="m-password-input">
3    <div v-for="(v, i) in 6" :key="i" class="box-input">
4      <div v-show="pwdList[i]" class="u-dot" @click="changePwd">•</div>
5      <input
6        :key="i"
7        v-model="pwdList[i]"
8        type="tel"
9        readonly
10        onfocus="this.removeAttribute('readonly');"
11        maxlength="1"
12        autocomplete="new-password"
13        class="u-input"
14        @input="changeInput"
15        @click="changePwd"
16        @keyup="keyUp($event)"
17        @keydown="oldPwdList = pwdList.length"
18      >
19    </div>
20  </div>
21</template>
22
23<script>
24export default {
25  props: {
26    id: {
27      type: Number,
28      default: 1 // 当一个页面有多个密码输入框时,用id来区分
29    }
30  },
31  data() {
32    return {
33      pwdList: [],
34      pwdListReal: [],
35      oldPwdList: [],
36      isDelete: false,
37      ipt: ''
38    }
39  },
40  mounted() {
41    this.ipt = document.querySelectorAll(`#ids_${this.id} .u-input`)
42  },
43  methods: {
44    keyUp(ev) {
45      let index = this.pwdList.length
46      if (!index) return
47      if (ev.keyCode === 8) {
48        this.isDelete = true
49        if (this.oldPwdList === this.pwdList.length) {
50          if (index === this.pwdList.length) {
51            this.pwdList.pop()
52          }
53          index--
54        } else {
55          index > 0 && index--
56        }
57        this.ipt[index].focus()
58      } else if (this.isDelete && index === this.pwdList.length && /^\d$/.test(ev.key)) {
59        this.isDelete = false
60        this.pwdList.pop()
61        this.pwdList.push(ev.key)
62        this.ipt[this.pwdList.length] && this.ipt[this.pwdList.length].focus()
63      }
64      this.$emit('get-pwd', this.pwdList.join(''))
65    },
66    changePwd() {
67      let index = this.pwdList.length
68      index === 6 && index--
69      this.ipt[index].focus()
70    },
71    changeInput() {
72      let index = this.pwdList.length
73      const val = this.pwdList[index - 1]
74      if (!/[0-9]/.test(val)) {
75        this.pwdList.pop()
76        return
77      }
78      if (!val) {
79        this.pwdList.pop()
80        index--
81        if (index > 0) this.ipt[index - 1].focus()
82      } else {
83        if (index < 6) this.ipt[index].focus()
84      }
85    }
86  }
87}
88</script>
89
90<style lang="scss" scoped>
91.m-password-input {
92  display: flex;
93  border-radius: 5px;
94  padding: 10px 0;
95  border: 1px solid #cccccc;
96  position: relative;
97  margin-left: 1px;
98  .box-input {
99    display: inline-block;
100    position: relative;
101    border-right: 1px solid #cccccc;
102    &:last-child{
103      border-right:0;
104    }
105    .u-dot {
106      position: absolute;
107      top: 0;
108      right: 0;
109      bottom: 0;
110      left: 0;
111      display: flex;
112      align-items: center;
113      justify-content: center;
114      font-size: 40px;
115    }
116    .u-input {
117      text-align: center;
118      font-size: 30px;
119      float: left;
120      width: 40px;
121      height: 20px !important;
122      color: transparent;
123      caret-color: #333333;
124      outline: unset;
125      border: none;
126      border-right: 1px solid #cccccc;
127      &:last-child{
128        border-right:0;
129      }
130    }
131  }
132}
133</style>
使用:
1<password-input @get-pwd="getPwd" />
2import PasswordInput from '@/components/PasswordInput'
3methods: {
4    getPwd(password) {
5      console.log(password)
6    }
7  }
参考文章: