
GoJS是一个实现交互类图表(比如流程图,树图,关系图,力导图等等)的JS库
gojs提供了angular的基本例子,不过是离线版
https://github.com/NorthwoodsSoftware/GoJS/tree/master/projects/angular-basic
下图是运行结果。上面是可拖动的,下面显示当前图表的结构
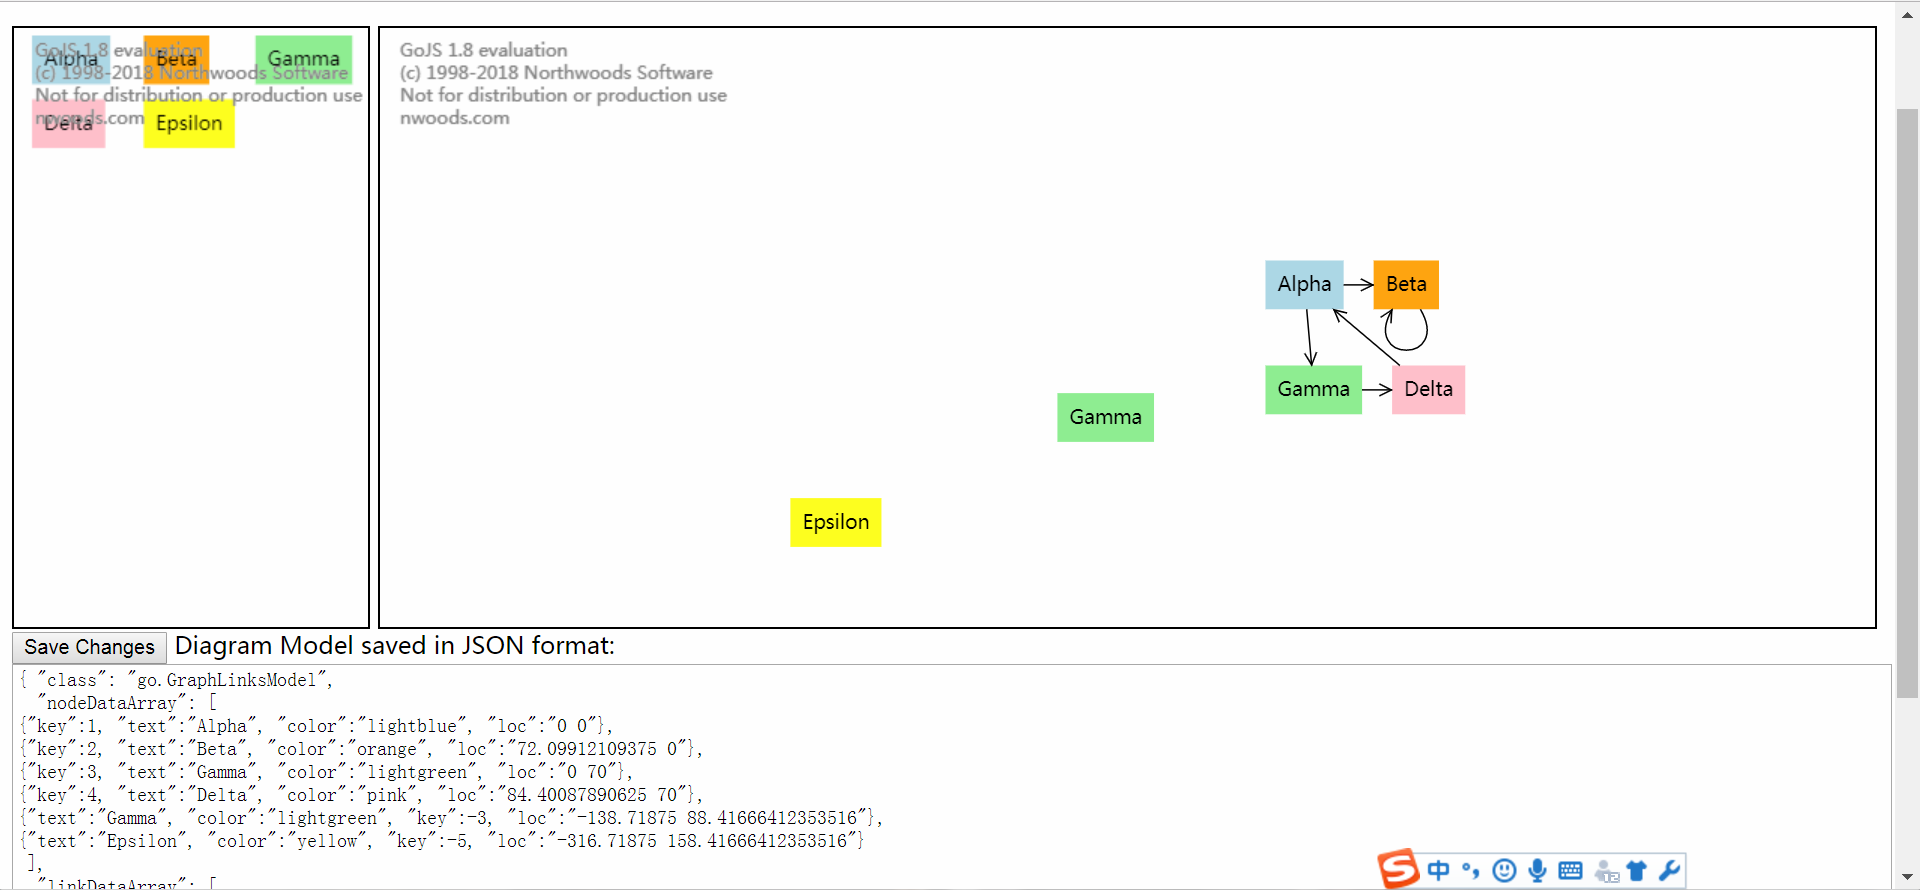
一。首先完成上面可拖动的部分
diagram-editor
diagram-editor.component.ts
constructor中完成初始化图表的基本属性如颜色等
this.getModel();从服务器获得列表
this.networkService.getModelText().then(r => { console.log(r); this.createModel(JSON.stringify(r)); });
r => { } r是获得的数据,括号里面可以添加对数据进行的操作(可以加函数),我获取数据就是完整的json格式的gojs图表,直接string化传给model它就可以识别了,图表格式如下
1{ "class": "go.GraphLinksModel",
2  "nodeDataArray": [
3{"key":1, "text":"Alpha", "color":"lightblue", "loc":"0 0"},
4{"key":2, "text":"Beta", "color":"orange", "loc":"72.09912109375 0"},
5{"key":3, "text":"Gamma", "color":"lightgreen", "loc":"0 70"},
6{"key":4, "text":"Delta", "color":"pink", "loc":"84.40087890625 70"},
7{"text":"Gamma", "color":"lightgreen", "key":-3, "loc":"-138.71875 88.41666412353516"},
8{"text":"Epsilon", "color":"yellow", "key":-5, "loc":"-316.71875 158.41666412353516"}
9 ],
10  "linkDataArray": [
11{"from":1, "to":2},
12{"from":1, "to":3},
13{"from":2, "to":2},
14{"from":3, "to":4},
15{"from":4, "to":1}
16 ]}
然后调用函数createModel,用gojs自带函数go.Model.fromJson显示表格,这样可以实现异步加载图表。
onSave()保存图表到服务器
1import { Component, OnInit, ViewChild, ElementRef, Input, Output, EventEmitter, AfterContentInit } from '@angular/core';
2import * as go from 'gojs';
3import { NetworkService } from '../network.service';
4import { Observable } from 'rxjs/observable';
5import { catchError, map, tap } from 'rxjs/operators';
6import { interval  } from 'rxjs/observable/interval';
7import {passBoolean} from 'protractor/built/util';
8@Component({
9  selector: 'app-diagram-editor',
10  templateUrl: './diagram-editor.component.html',
11  styleUrls: ['./diagram-editor.component.css']
12})
13export class DiagramEditorComponent implements OnInit {
14  private diagram: go.Diagram = new go.Diagram();
15  private palette: go.Palette = new go.Palette();
16
17
18  @ViewChild('diagramDiv')
19  private diagramRef: ElementRef;
20
21  @ViewChild('paletteDiv')
22  private paletteRef: ElementRef;
23
24  @Input()
25  get model(): go.Model { return this.diagram.model; }
26  set model(val: go.Model) { this.diagram.model = val; }
27  @Output()
28  nodeSelected = new EventEmitter<go.Node|null>();
29
30  @Output()
31  modelChanged = new EventEmitter<go.ChangedEvent>();
32
33  constructor(private networkService: NetworkService) {
34    this.getModel();
35    const $ = go.GraphObject.make;
36    this.diagram = new go.Diagram();
37    this.diagram.initialContentAlignment = go.Spot.Center;
38    this.diagram.allowDrop = true;  // necessary for dragging from Palette
39    this.diagram.undoManager.isEnabled = true;
40    this.diagram.addDiagramListener("ChangedSelection",
41      e => {
42        const node = e.diagram.selection.first();
43        this.nodeSelected.emit(node instanceof go.Node ? node : null);
44      });
45    this.diagram.addModelChangedListener(e => e.isTransactionFinished && this.modelChanged.emit(e));
46
47    this.diagram.nodeTemplate =
48      $(go.Node, "Auto",
49        new go.Binding("location", "loc", go.Point.parse).makeTwoWay(go.Point.stringify),
50        $(go.Shape,
51          {
52            fill: "white", strokeWidth: 0,
53            portId: "", cursor: "pointer",
54            // allow many kinds of links
55            fromLinkable: true, toLinkable: true,
56            fromLinkableSelfNode: true, toLinkableSelfNode: true,
57            fromLinkableDuplicates: true, toLinkableDuplicates: true
58          },
59          new go.Binding("fill", "color")),
60        $(go.TextBlock,
61          { margin: 8, editable: true },
62          new go.Binding("text").makeTwoWay())
63      );
64
65    this.diagram.linkTemplate =
66      $(go.Link,
67        // allow relinking
68        { relinkableFrom: true, relinkableTo: true },
69        $(go.Shape),
70        $(go.Shape, { toArrow: "OpenTriangle" })
71      );
72
73    this.palette = new go.Palette();
74    this.palette.nodeTemplateMap = this.diagram.nodeTemplateMap;
75
76    // initialize contents of Palette
77    this.palette.model.nodeDataArray =
78      [
79        { text: "Alpha", color: "lightblue" },
80        { text: "Beta", color: "orange" },
81        { text: "Gamma", color: "lightgreen" },
82        { text: "Delta", color: "pink" },
83        { text: "Epsilon", color: "yellow" }
84      ];
85  }
86
87  ngOnInit() {
88    this.diagram.div = this.diagramRef.nativeElement;
89    this.palette.div = this.paletteRef.nativeElement;
90  }
91  getModel(): void {
92
93         this.networkService.getModelText().then(r => { console.log(r); this.createModel(JSON.stringify(r)); });
94
95}
96createModel(a: string ): void {
97  this.model = go.Model.fromJson(a);
98
99}
100  onSave(): void {
101    this.networkService.saveModel(this.diagram.model.toJson()).subscribe();
102  }
103
104}
diagram-editor.component.html
1<div class="diagramsPanel">
2  <div #paletteDiv class="paletteDiv"></div>
3  <div #diagramDiv class="diagramDiv"></div>
4  <div>
5  <button (click)="onSave()">Save Changes</button>
6  Diagram Model saved in JSON format:
7  </div>
8  <div>
9  <textarea *ngIf="model" style="width:100%;height:300px">
10{{model.toJson()}}
11</textarea>
12  </div>
13</div>
二。下半部分显示json字符串:
1import { Component, OnInit, ViewChild, ElementRef, Input, Output, EventEmitter } from '@angular/core';
2import * as go from 'gojs';
3
4@Component({
5  selector: 'app-diagram-detail',
6  templateUrl: './diagram-detail.component.html',
7  styleUrls: ['./diagram-detail.component.css']
8})
9export class DiagramDetailComponent implements OnInit {
10  @Input() node: go.Node;
11  @Input() data: any;
12  constructor() { }
13
14  ngOnInit() {
15  }
16  showDetails(node: go.Node | null) {
17    this.node = node;
18    if (node) {
19      // copy the editable properties into a separate Object
20      this.data = {
21        text: node.data.text,
22        color: node.data.color
23      };
24    } else {
25      this.data = null;
26    }
27  }
28}
diagram-detail.component.html
1<div *ngIf="node">
2<form *ngIf="node" #form="ngForm" (ngSubmit)="onCommitDetails()">
3  Node Details:
4  <div><label>Key: </label>{{node.key}}</div>
5  <div><label>Text: </label><input [(ngModel)]="data.text" name="text"></div>
6  <div><label>Color: </label><input [(ngModel)]="data.color" name="color"></div>
7  <div><label>Location: </label>{{node.location.x.toFixed(2)}}, {{node.location.y.toFixed(2)}}</div>
8  <div><label># Links: </label>{{node.linksConnected.count}}</div>
9</form>
10</div>
三。与服务器通信,用了promise,可以实现异步传输,使用rxjs库需要具体说明路径,有部分冗余代码,不懂得可以看看angular官方文档http部分
network.service.ts
1import { Injectable } from '@angular/core';
2import { Observable } from 'rxjs/Observable';
3import { HttpClient, HttpHeaders, HttpClientModule } from '@angular/common/http';
4import { of } from 'rxjs/observable/of';
5import { catchError, map, tap , retry } from 'rxjs/operators';
6import 'rxjs/add/operator/toPromise';
7import { MessageService } from './message.service';
8import {promise} from 'selenium-webdriver';
9const httpOptions = {
10  //headers: new HttpHeaders({ 'Content-Type': 'application/json' })
11  headers: new HttpHeaders({'Content-Type': 'application/x-www-form-urlencoded'})
12};
13@Injectable()
14export class NetworkService {
15  public API = '//localhost:8888';
16  private getModelUrl = this.API + '/gojs/get';  // URL to web api
17  private saveModelUrl = this.API + '/gojs/save';
18  constructor(private http: HttpClient,
19              private messageService: MessageService) { }
20  // getModel(): Observable<string> {
21  //   const url = `${this.getModelUrl}`;
22  //   return this.http.get<string>(url).pipe(
23  //    catchError(this.handleError<string>(`getModel`))
24  //   );
25  // }
26
27  /** GET: get the model on the server */
28  getModelText(): Promise<any> {
29    // The Observable returned by get() is of type Observable<string>
30    // because a text response was specified.
31    // There's no need to pass a <string> type parameter to get().
32    return this.http.get(this.getModelUrl).toPromise().catch(this.handleError());
33  }
34
35
36  /** PUT: update the model on the server */
37  saveModel (data: string): Observable<any> {
38    // return this.http.post(this.saveModelUrl, data, httpOptions).pipe(
39    //   catchError(this.handleError<any>('saveModel'))
40    // );
41    const body = {model: data};
42    this.http.post(this.saveModelUrl,
43      'model=' + data, httpOptions).subscribe(model => {
44      console.log(data);
45    });
46    return null;
47  }
48
49  /**
50   * Handle Http operation that failed.
51   * Let the app continue.
52   * @param operation - name of the operation that failed
53   * @param result - optional value to return as the observable result
54   */
55  private handleError<T> (operation = 'operation', result?: T) {
56    return (error: any): Observable<T> => {
57
58      // TODO: send the error to remote logging infrastructure
59      console.error(error); // log to console instead
60
61      // TODO: better job of transforming error for user consumption
62      this.log(`${operation} failed: ${error.message}`);
63
64      // Let the app keep running by returning an empty result.
65      return of(result as T);
66    };
67  }
68
69
70  /** Log a HeroService message with the MessageService */
71  private log(message: string) {
72    this.messageService.add('NetworkService: ' + message);
73  }
74}
message.service.ts没什么大用
1import { Injectable } from '@angular/core';
2
3@Injectable()
4export class MessageService {
5  messages: string[] = [];
6
7  add(message: string) {
8    this.messages.push(message);
9  }
10
11  clear() {
12    this.messages = [];
13  }
14}
服务器和angular位于不同端口,添加以下代码,否则不允许访问,这里用的服务器是springboot,服务器就比较简单了,不再细说
1import org.springframework.context.annotation.Configuration;
2import org.springframework.web.servlet.config.annotation.CorsRegistry;
3import org.springframework.web.servlet.config.annotation.WebMvcConfigurerAdapter;
4
5@Configuration
6public class CorsConfig extends WebMvcConfigurerAdapter {
7
8    @Override
9    public void addCorsMappings(CorsRegistry registry) {
10        registry.addMapping("/**")
11                .allowedOrigins("*")
12                .allowCredentials(true)
13                .allowedMethods("GET", "POST", "DELETE", "PUT")
14                .maxAge(3600);
15    }
16
17}