
前面分享了两篇关于.NET的服务端校验的文章,在系统里光有服务端校验虽然能够勉强使用,但会出现许多不愉快的体验,如上一章我在最后提交的时候填写了3个表单,在仅有最后一个表单出现了错误的时候,虽然达到了校验功能,表明了错误,但我前面三个表单的数据都被干掉了啊。再则比如注册的时候我填了那么多东西,我提交后你却告诉我已经被注册了,如果不是真爱,大概会毫不留情的Alt+F4 再也不见啦。
为了解决这个问题,我们必须在系统中采用双校验,前端校验那么多,咱们ASP.NET MVC创建时默认会引入jquery-validate,但在这里我就不过多介绍jquery-validate了,原因是...其实我也没怎么用过都是默认生成的顶多测试时用用,哈哈,这并不是说jquery-validate不好,只是我们现在所要搭建的这个系统是基于Vue的前后端分离项目,而Vue则是以数据为驱动的,所以咱们这暂时就不用讨论jquery-validate了。
如果不熟悉Vue的同学呢,可以先去Vue的官网看看,文档很详细,作者中国人,所以文档的易读性也很高,现在Vue已经是非常火的前端MVVM框架了,各种资料、教程也多,我就不过多重复了(其实我也才接触Vue不到一月,实在不敢瞎扯)。
在Vue的官网上看到表单验证的介绍,大致是通过给form绑定@submit事件,在事件里通过对字段的验证决定要不要阻止提交。
1<form id="app" @submit="checkForm" action="https://vuejs.org/" method="post">
2
3  <p v-if="errors.length">
4    <b>Please correct the following error(s):</b>
5    <ul>
6      <li v-for="error in errors">{{ error }}</li>
7    </ul>
8  </p>
9
10  <p>
11    <label for="name">Name</label>
12    <input type="text" name="name" id="name" v-model="name">
13  </p>
14
15  <p>
16    <label for="age">Age</label>
17    <input type="number" name="age" id="age" v-model="age" min="0">
18  </p>
19
20  <p>
21    <label for="movie">Favorite Movie</label>
22    <select name="movie" id="movie" v-model="movie">
23      <option>Star Wars</option>
24      <option>Vanilla Sky</option>
25      <option>Atomic Blonde</option>
26    </select>
27  </p>
28
29  <p>
30    <input type="submit" value="Submit">
31  </p>
32
33</form>
34
35const app = new Vue({
36  el:'#app',
37  data:{
38    errors:[],
39    name:null,
40    age:null,
41    movie:null
42  },
43  methods:{
44    checkForm:function(e) {
45      if(this.name && this.age) return true;
46      this.errors = [];
47      if(!this.name) this.errors.push("Name required.");
48      if(!this.age) this.errors.push("Age required.");
49      e.preventDefault();
50    }
51  }
52})
Vue官网上的验证,是的,它非常短小精悍的完成了校验。
但说真的,这不是我想要的,我还是需要去写逻辑,我就想像前两章后台校验那样通过函数链式配置完成。
怎么办呢,Vue自己又没有,用别的框架?我咋知道有啥框架可用,我才刚认识它(Vue),对它的六大姑七大婆还不熟呢。
既然使用方式已定,又找不到别的办法,那就只有自己下地狱了。
本章节采用了ES6的语法,如看官还不熟悉ES6请先了解一下ES6基础后再来。
假设我有个实体Student
1class Student {
2            constructor() {
3                this.name = undefined;
4                this.age = undefined;
5                this.sex = undefined;
6            }
7        }
首先我确定了我的使用方式像这样
1this.ruleFor("name")
2                    .NotEmpty()
3                    .WithMessage("名称必填")
4                    .MinimumLength(5)
5                    .WithMessage("最短长度为5");
6
7                this.ruleFor("age")
8                    .NotEmpty()
9                    .WithMessage("年龄必须")
10                    .Number(0, 100)
11                    .WithMessage("年龄必须在0-100岁之间");
12
13                this.ruleFor("sex")
14                    .NotEmpty()
15                    .WithMessage("性别必填")
16                    .Must(m => !m.sex)
17                    .WithMessage("gxq is a man");
从FluentValidation认识哪里开始,FluentValidation的使用需要一个验证器,没关系,那我也创建一个验证器名字叫StudentValidator的验证器
1 class StudentValidator{
2            constructor(){
3
4            }
5        }
我们知道要想向ruleFor()、NotEmpty()等这样使用 首先我得具有ruleFor这些方法才行啊,反观FluentValidation,我们发现他必须要继承自AbstractValidator<T>,其中T代表验证器要验证的类型。
javascript没有泛型,但我们也可以继承自Validator啊,不支持泛型,我还不能用参数表单我要验证那个实体了么。╭(╯^╰)╮
于是乎
1class Validator {
2    constructor(model) {
3
4        this.model =new model();
5    }
6
7    ruleFor(field) {   //此处表达式返回一个指定字段哈
8
9    }
10
11    validation(targetElement) {
12
13    }
14}
Validator就这么出现了,首先他有一个参数,参数是传递一个构造函数进去的,实体名就是构造函数,比如前面的Student。
内部定义了一个ruleFor方法,有一个参数,表明为指定属性配置验证规则。为了降低使用成本,尽量和前面使用的后台验证框架用法一致。
还定义了一个validation方法有一个参数触发对象,这个对象实际上是sumbit那个按钮,后面在做解释。
现在我们让StudentValidator继承自Validator,这样我们的StudentValidator就变为了
1 class StudentValidator extends Validator {
2            constructor(typeName) {
3                super(typeName);
4                this.ruleFor("name");this.ruleFor("age");
5                 this.ruleFor("sex");
6
7            }
8        }
可以指定字段了,但不能配置这像什么话,二话不说继续改。
从哪里开始改呢?已经调用了ruleFor方法,要想实现接着.NotEmpty()的话那必须从ruleFor下手了。
方向已经明确了,但总的有具体实施方案啊,于是啊苦想半天,我认为我们的ruleFor既然是为了给目标字段定义验证,并且是链式的可以为目标字段配置多个验证规则如
1this.ruleFor("age")
2                    .NotEmpty()
3                    .WithMessage("年龄必须")
4                    .Number(0, 100)
5                    .WithMessage("年龄必须在0-100岁之间");
那么我们就应该在ruleFor的时候返回一个以字段名为唯一标识的对象,幸好啊,在ES6中提供了一种数据类型叫Map,他有点类似于咱们C#的Dictionary,现在数据类型有了,键有了,那我这个键对应的值该是什么呢?
继续分析,这个值里必须具备NotEmpty、Number等这些函数我才能够调用啊,既然这样,那毫无疑问它又是一个对象了。
于是我创建了RuleBuilderInitial对象,基础结构如下
1class RuleBuilderInitial {
2
3    constructor() {
4
5        this.length = undefined;
6        this.must = undefined;
7        this.maximumLength = undefined;
8        this.minimumLength = undefined;
9        this.number = undefined;
10    }
11
12    /*
13     *  非空
14     */
15    NotEmpty() {
16
17    }
18    Length(min, max) {
19
20    }
21    Must(expression) {
22
23    }
24    EmailAddress() {
25
26    }
27    MaximumLength(max) {
28
29    }
30    MinimumLength(min) {
31
32    }
33    Number(min, max) {
34
35    }
36}
有了RuleBuilderInitial后我们来改造下Validator
1class Validator {
2    constructor(model) {
3
4        this.model =new model();
5
6        this.fieldValidationSet = new Map();
7    }
8
9    ruleFor(field) {   //此处表达式返回一个指定字段哈
10
11        //  验证配置以字段作为唯一单位,每个字段对应一个初始化器
12        this.fieldValidationSet.set(field, new RuleBuilderInitial());
13        return this.fieldValidationSet.get(field);
14    }
15
16    validation(targetElement) {
17
18
19    }
20}
在Validator里我们新增了fieldValidationSet 他是一个Map数据结构,前面说到了Map就是一个键值对,只不过他比较唯一,他不允许键重复,如果键值对里已存在Key,则新的Value不会替换掉之前的Value。
我们用这个fieldValidationSet来保存以字段名为单位的验证配置。因为Map的结构原因,ruleFor确保了每个字段的配置项唯一的工作。
在ruleFor时,我们将new 一个RuleBuilderInitial对象,并将它和字段一起添加到Map去,最后将这个RuleBuilderInitial对象从Map里取出并返回。
我们知道在RuleBuilderInitial对象里定义了许多方法如NotEmpty、Number等,所以现在我们可以这样写了。
1 class StudentValidator extends Validator {
2            constructor(typeName) {
3                super(typeName);
4                this.ruleFor("name")
5                    .NotEmpty()
6
7                this.ruleFor("age")
8                    .NotEmpty()
9
10                this.ruleFor("sex")
11                    .NotEmpty()
12
13            }
14        }
typeName是类型名,略略略,上面忘了解释了,在Validator的构造函数里我们不是有一个model吗,拿到model后我们new model了,所以typeName应该为我们要验证的实体如Student。
首先这显然不是我们想要的,我们希望在NotEmpty后能够接着调用WithMessage()方法,汲取了上面ruleFor的经验,肯定是在NotEmpty方法里返回一个新对象,并且这个新对象具备WithMessage方法。这没问题,太简单了,也许我们在创建一个叫 RuleBuilderOptions的对象就一切OK了,在NotEmpty()中只需要返回这个 RuleBuilderOptions对象就行了,可事实上我们希望的是在返回RuleBuilderOptions对象后调用WithMessage方法后并继续调用Number等其他方法。
梳理一下结构,我们在Validator种以字段作为key创建了RuleBuilderInitial,也就是说每个字段只有一个唯一的RuleBuilderInitial,在RuleBuilderInitial中如果享有多个验证的配置,同样我想也需要一个以验证名为key,RuleBuilderOptions为实例的针对不同验证信息的存储对象。于是我先创建了RuleBuilderOptions
1class RuleBuilderOptions {
2
3    constructor() {
4        this.errorMessage = '';
5    }
6
7    WithMessage(errorMessage) {
8        this.errorMessage = errorMessage;
9    }
10}
紧接着在修改了 RuleBuilderInitial
1class RuleBuilderInitial {
2
3    constructor() {   // T:验证的目标类型 TProperty:验证的属性类型
4        //  以具体的验证方式作为唯一单位
5        this.validationSet = new Map();
6        this.length = undefined;
7        this.must = undefined;
8        this.maximumLength = undefined;
9        this.minimumLength = undefined;
10        this.number = undefined;
11    }
12
13    /*
14     *  非空
15     */
16    NotEmpty() {
17        this.validationSet.set("NotEmpty", new RuleBuilderOptions());
18        return this.validationSet.get('NotEmpty');
19    }
20    Length(min, max) {
21        this.validationSet.set("Length", new RuleBuilderOptions());
22        this.length = { min: min, max: max };
23        return this.validationSet.get("Length");
24    }
25    Must(expression) {
26        this.validationSet.set("Must", new RuleBuilderOptions());
27        this.must = expression;
28        return this.validationSet.get("Must");
29    }
30    EmailAddress() {
31        this.validationSet.set("EmailAddress", new RuleBuilderOptions());
32        return this.validationSet.get('EmailAddress');
33    }
34    MaximumLength(max) {
35        this.validationSet.set("MaximumLength", new RuleBuilderOptions());
36        this.maximumLength = max;
37        return this.validationSet.get('MaximumLength');
38    }
39    MinimumLength(min) {
40        this.validationSet.set("MinimumLength", new RuleBuilderOptions());
41        this.minimumLength = min;
42        return this.validationSet.get('MinimumLength');
43    }
44    Number(min, max) {
45        this.validationSet.set("Number", new RuleBuilderOptions());
46        this.number = { min: min, max: max };
47        return this.validationSet.get("Number");
48    }
49}
在调用NotEmpty()之后先将我对该字段非空校验的要求保存到 validationSet 里去,具体措施就是以验证名为key,以一个RuleBuilderOptions实例为value 存储到 validationSet 然后返回这个 RuleBuilderOptions,因为它能让我接着调用WithMessage("")
遗憾的是这样做了之后我发现我调用WithMessage("")后不能再接着调用其他的验证方法了。噢,我想到了,我可以给 RuleBuilderOptions 的构造函数添加一个参数,然后在new RuleBuilderOptions 的时候将this传进去 而new RuleBuilderOptions的地方只有
RuleBuilderInitial,这个this 也就自然而然的成了当前所要验证的那个字段的唯一 RuleBuilderInitial 实例,只要在WithMessage之后将这个this 返回回来一切似乎就大功告成了。
于是美滋滋的把代码改成了这样。
1class RuleBuilderOptions {
2
3    constructor(initial) {
4        this.errorMessage = '';
5        this.ruleBuilderInitial = initial;
6    }
7
8    WithMessage(errorMessage) {
9        this.errorMessage = errorMessage;
10        return this.ruleBuilderInitial;
11    }
12}
13
14class RuleBuilderInitial {
15
16    constructor() {   // T:验证的目标类型 TProperty:验证的属性类型
17        //  以具体的验证方式作为唯一单位
18        this.validationSet = new Map();
19        this.length = undefined;
20        this.must = undefined;
21        this.maximumLength = undefined;
22        this.minimumLength = undefined;
23        this.number = undefined;
24    }
25
26    /*
27     *  非空
28     */
29    NotEmpty() {
30        this.validationSet.set("NotEmpty", new RuleBuilderOptions(this));
31        return this.validationSet.get('NotEmpty');
32    }
33    Length(min, max) {
34        this.validationSet.set("Length", new RuleBuilderOptions(this));
35        this.length = { min: min, max: max };
36        return this.validationSet.get("Length");
37    }
38    Must(expression) {
39        this.validationSet.set("Must", new RuleBuilderOptions(this));
40        this.must = expression;
41        return this.validationSet.get("Must");
42    }
43    EmailAddress() {
44        this.validationSet.set("EmailAddress", new RuleBuilderOptions(this));
45        return this.validationSet.get('EmailAddress');
46    }
47    MaximumLength(max) {
48        this.validationSet.set("MaximumLength", new RuleBuilderOptions(this));
49        this.maximumLength = max;
50        return this.validationSet.get('MaximumLength');
51    }
52    MinimumLength(min) {
53        this.validationSet.set("MinimumLength", new RuleBuilderOptions(this));
54        this.minimumLength = min;
55        return this.validationSet.get('MinimumLength');
56    }
57    Number(min, max) {
58        this.validationSet.set("Number", new RuleBuilderOptions(this));
59        this.number = { min: min, max: max };
60        return this.validationSet.get("Number");
61    }
62}
至此,我们已经可以这样配置了。
1  class StudentValidator extends Validator {
2            constructor(typeName) {
3                super(typeName);
4                this.ruleFor("name")
5                    .NotEmpty()
6                    .WithMessage("名称必填")
7                    .MinimumLength(5)
8                    .WithMessage("最短长度为5");
9
10                this.ruleFor("age")
11                    .NotEmpty()
12                    .WithMessage("年龄必须")
13                    .Number(0, 100)
14                    .WithMessage("年龄必须在0-100岁之间");
15
16                this.ruleFor("sex")
17                    .NotEmpty()
18                    .WithMessage("性别必填")
19                    .Must(m => !m.sex)
20                    .WithMessage("gxq is a man");
21            }
22        }
以为可以用了?还早呢,我先去吃个饭,晚上回来接着写,(#^.^#)。
由于内容比较多,吃了个饭补充了点能量回来继续撸(* ̄︶ ̄)
上面的内容我们定义了三个对象,Validator、RuleBuilderOptions、RuleBuilderInitial
在使用方面,我们需要定义一个验证器去继承自Validator,在验证器的构造函数里进行配置验证规则。
而RuleBuilderInitial则是字段规则的生成器,换句话说,他里面能配置各种验证规则。
在验证规则生成器对象里又有一个大的容器啊,他能干满呢?他能装关于这个字段的多个验证规则,而每一个验证规则又对应着一个具体的规则选项 RuleBuilderOptions,说直白点就是你这个验证规则如果触发了,如果没通过,则我总要做点相应措施吧,都放到这个RuleBuilderOptions里面的,而我们现在最简单的就放着一个WithMessage方法嘛。
好了,结构已经再次梳理了一遍,但我们还没有编写验证功能啊,接下来我们要完成Validator类里的Validation方法。
在准备编写验证代码的时候,我又想到了,要是验证错了,我该怎么办呢?把错误信息放在那里呢?
因为最初想法是基于Vue的,而Vue是基于数据的,所以最好的办法就是在实体里定义一个error对象,在这里你是否有疑惑?这算什么好的办法,难道我每次使用的时候还要定义一个error属性?哈哈,当然不用,如果真是那样,我就不用写这么多了,因为没必要写,这样用起来简直太蠢了。幸好Javascript的易扩展性使我们轻易完成了这件事,还记得我们的Validator什么样子吗?
1class Validator {
2    constructor(model) {
3
4        this.model =new model();
5
6        this.fieldValidationSet = new Map();
7    }
8
9    ruleFor(field) {   //此处表达式返回一个指定字段哈
10
11        //  验证配置以字段作为唯一单位,每个字段对应一个初始化器
12        this.fieldValidationSet.set(field, new RuleBuilderInitial());
13        return this.fieldValidationSet.get(field);
14    }
15
16    validation(targetElement) {
17
18
19    }
20}
没错,里面有个this.model,这个model是啥呢?为什么要new 他呢? 首先model是我们要验证的对象,如Student,用前端专业一点的描述就是一个构造函数,那为什么要new 他呢?因为Vue是基于数据的,你验证Student没关系,你只需要
var test = new StudentValidator(Student);
咱们这test.model就是一个Student的实例,用起来就简单多了。
而javascript的扩展性让我们可以轻松的为对象扩展属性,我们为Student添加一个error属性,想想他该存储些什么,首先我认为既然是error,那他一定要存储错误信息。对,没错,在error对象里首先得有这个对象的所有属性,除了error以外的,这是最基本的。
还有他必须具备一个清空验证信息的操作,因为在验证失败的时候我们会在error里记录验证的结果,若第一次name字段验证失败了,error["name"]记录了name的错误消息,第二次name验证成功了,却没更改error["name"]那将是个大bug啊。所以我们需要一个
clearValue方法
其次既然我们在验证,那我们肯定需要知道我们的error对象里面是否存在错误,所以我们还需要一个
exist方法
还有啊,我提前保留了一个code字段,我想将来一定会用上的,这里大家可以猜测哦。想好了就开始行动,经过一通修改,
1class Validator {
2    constructor(model) {
3
4        this.model = model.constructor.name === "Function" ? new model() : model;
5
6        this.model.error = {
7            code: '',
8            clearValue: function () {
9                for (const key in this) {
10                    if (this.hasOwnProperty(key) && key != 'clearValue' && key != 'exist') {
11                        this[key] = '';
12                    }
13                }
14            },
15            exist: function () {
16                let exist = false;
17                for (const key in this) {
18                    if (this.hasOwnProperty(key) && key != 'clearValue' && key != 'exist') {
19                        if (this[key] != '') {
20                            exist = true;
21                            break;
22                        }
23                    }
24                }
25                return exist;
26            }
27        };
28
29        for (const key in this.model) {
30            if (this.model.hasOwnProperty(key) && key != 'error') {
31                this.model.error[key] = '';
32            }
33        }
34
35        this.fieldValidationSet = new Map();
36    }
37
38    ruleFor(field) {   //此处表达式返回一个指定字段哈
39
40        //  验证配置以字段作为唯一单位,每个字段对应一个初始化器
41        this.fieldValidationSet.set(field, new RuleBuilderInitial());
42        return this.fieldValidationSet.get(field);
43    }
44
45    validation(targetElement) {
46
47    }
48}
哈哈,正如我之前所分析那样,为this.model定义一个error对象,并添加clearValue 和 exist方法,这里为什么 key != 'clearValue' && key != 'exist'相信已经不用我解释了,因为除了他两其他的字段才算有效字段啊。为什么是key!=‘’
我认为在错误也是需要引用的,而''在显示中实际上什么也看不见,那就当它没失败咯。所以我们的clearValue也只是简单的将所有字段当然除了上述两位以外全部变为''即可。
现在错误也有了,真的就只差验证功能了。
想一下实现思路,我们之前将验证规则都存起来了,现在实际上我们只需要取出来就行啦。
在验证中首先我们要清空所有错误,以保证干净。
然后在Validator内部有一个名字为 fieldValidationSet 的键值对对象,他存储了所有属性的配置规则生成器,遍历这个生成器我们将能取出每个属性的验证规则。
然后对这个字段的验证规则进行筛选咯。如果验证失败的话,将这个验证规则从集合里取出来,他的Value就应该是一个 RuleBuilderOptions 然后取出errorMessage就是它验证失败后的显示消息,赋给谁呢?当然赋给this.model.error["字段名"]了。
思路有了接下来就照着去做了呗。于是Validator成了这个样子。
1class Validator {
2    constructor(model) {
3
4        this.model =  new model();
5
6        this.model.error = {
7            code: '',
8            clearValue: function () {
9                for (const key in this) {
10                    if (this.hasOwnProperty(key) && key !== 'clearValue' && key !== 'exist') {
11                        this[key] = '';
12                    }
13                }
14            },
15            exist: function () {
16                let exist = false;
17                for (const key in this) {
18                    if (this.hasOwnProperty(key) && key !== 'clearValue' && key !== 'exist') {
19                        if (this[key] !== '') {
20                            exist = true;
21                            break;
22                        }
23                    }
24                }
25                return exist;
26            }
27        };
28
29        for (const key in this.model) {
30            if (this.model.hasOwnProperty(key) && key !== 'error') {
31                this.model.error[key] = '';
32            }
33        }
34
35        this.fieldValidationSet = new Map();
36    }
37
38    ruleFor(field) {   //此处表达式返回一个指定字段哈
39
40        //  验证配置以字段作为唯一单位,每个字段对应一个初始化器
41        this.fieldValidationSet.set(field, new RuleBuilderInitial());
42        return this.fieldValidationSet.get(field);
43    }
44
45    validation(targetElement) {
46        this.model.error.clearValue();
47        for (const [field, initial] of this.fieldValidationSet) {
48
49            const property = this.model[field];
50            for (const [config, options] of initial.validationSet) {
51                switch (config) {
52                    case "NotEmpty":
53                        if (!property) {
54                            this.model.error[field] = initial.validationSet.get("NotEmpty").errorMessage;
55                        }
56                        break;
57                    case "MinimumLength":
58                        if (property && initial.minimumLength) {
59                            if (property.length < initial.minimumLength) {
60                                this.model.error[field] = initial.validationSet.get("MinimumLength").errorMessage;
61                            }
62                        }
63                        break;
64                    case "MaximumLength":
65                        if (property && initial.maximumLength) {
66                            if (property.length > initial.minimumLength) {
67                                this.model.error[field] = initial.validationSet.get("MaximumLength").errorMessage;
68                            }
69                        }
70                        break;
71
72                    case "Length":
73                        if (property && initial.length) {
74                            if (property.length > initial.length["max"] || property.length < initial.length["min"]) {
75                                this.model.error[field] = initial.validationSet.get("Length").errorMessage;
76                            }
77                        }
78                        break;
79                    case "Must":
80                        if (property && initial.must && this.model) {
81                            if (initial.must(this.model)) {
82                                console.log(field);
83                                this.model.error[field] = initial.validationSet.get("Must").errorMessage;
84                            }
85                        }
86                        break;
87                    case "Number":
88
89                        let propertyNum = Number(property);
90
91                        if (property && !isNaN(propertyNum) && initial.number) {
92                            if (propertyNum > initial.number.max || propertyNum < initial.number.min) {
93                                this.model.error[field] = initial.validationSet.get("Number").errorMessage;
94                            }
95                        } else {
96                            this.model.error[field] = "必须是Number类型";
97                        }
98                        break;
99                }
100            }
101        }
102        if (!this.model.error.exist()) {    //没有错误
103            this.model.error.code = -2; //通过验证
104            targetElement.click();  //  重新触发submit
105        }
106    }
107
108    passValidation() {
109        return this.model.error.code === -2 ? true : false;
110    }
111}
相信大家已经看到了那个code的作用了对吧。是的,他变成了一个内置的标识。等会大家就知道他的用途啦。
到这里验证器算是写完了。
现在大家来一起感受一下我们自己做的这个验证器吧。
1<!DOCTYPE html>
2<html lang="en">
3
4<head>
5    <meta charset="UTF-8">
6    <meta name="viewport" content="width=device-width, initial-scale=1.0">
7    <meta http-equiv="X-UA-Compatible" content="ie=edge">
8    <title>Document</title>
9    <script type="text/javascript" src="vue.js"></script>
10    <script src="validator.js"></script>
11</head>
12
13<body>
14    <div id="box">
15        <form action="https://www.baidu.com">
16            <input type="text" v-model="model.name">
17            <span>{{model.error.name}}</span>
18            <input type="text" v-model="model.age">
19            <span>{{model.error.age}}</span>
20            <input type="checkbox" v-model="model.sex">
21            <span>{{model.error.sex}}</span>
22            <input type="submit" value="提交" @click="submit({ev:$event})">
23        </form>
24    </div>
25    <script>
26
27        class Student {
28            constructor() {
29                this.name = undefined;
30                this.age = undefined;
31                this.sex = undefined;
32            }
33        }
34        //  自定义验证
35        class StudentValidator extends Validator {
36            constructor(typeName) {
37                super(typeName);
38                this.ruleFor("name")
39                    .NotEmpty()
40                    .WithMessage("名称必填")
41                    .MinimumLength(5)
42                    .WithMessage("最短长度为5");
43
44                this.ruleFor("age")
45                    .NotEmpty()
46                    .WithMessage("年龄必须")
47                    .Number(0, 100)
48                    .WithMessage("年龄必须在0-100岁之间");
49
50                this.ruleFor("sex")
51                    .NotEmpty()
52                    .WithMessage("性别必填")
53                    .Must(m => !m.sex)
54                    .WithMessage("gxq is a man");
55            }
56        }
57        let vm = new Vue({
58            el: '#box',
59            data: {
60                validator: new StudentValidator(Student),
61            },
62            methods: {
63                submit: function ({ ev }) {
64
65                    if (this.validator.passValidation()) {                        return;
66                    }
67
68                    ev.preventDefault();
69
70                    this.validator.validation(ev.target);                }
71            },
72            computed: {
73                model: {
74                    get: function () {
75                        return this.validator.model;
76                    }
77                }
78            }
79        });
80
81    </script>
82</body>
83
84</html>
在使用上其实就比较简单了,在Vue中添加一个计算属性model 返回return this.validator.model。实质上就是我们验证器内置的需要验证的对象。当然你可以不用添加计算属性,直接this.validator.model也行,只是我想这样太长了。
在submit的时候绑定click事件,里面有个事件对象,首先先调用validator.passValidation 判断是否通过验证,实际上啊,内部就是判断code是不是等于-2 为什么等于-2呢?因为我们在调用Validation的最后 会判断error里面是否exist,如果不存在值则表明验证通过,没有错误消息,这个时候就会将code改为-2。看官也许懵了,你一来就判断 那肯定不等于-2啊,确实如此啊。所以一来肯定会执行ev.preventDefault() 来阻止提交,既然阻止提交了,那我要是验证通过了怎么办?那不也不会提交了吗?关键参数就在这个validation的参数上,之前有解释参数是目标对象,实际上就是触发了submit的对象,很显然在这里就是那个<input type="submit" />的按钮,通过点击事件的ev.target就能获取到这个对象,我将它传给了validation 在validation内部,如果验证通过了,既error对象里不存在有值的话不仅会将code改为-2 还会调用targetElement的click方法 来再一次触发这个按钮得点击事件,所以在第二次触发的时候,他就通过并提及啦。
1  if (!this.model.error.exist()) {    //没有错误
2            this.model.error.code = -2; //通过验证
3            targetElement.click();  //  重新触发submit
4        }
前面在Input上绑定的model.name model.error["name"]我就不过多做解释了哈,原因全在上面代码里,(#^.^#)。接下来我们让他跑起来。

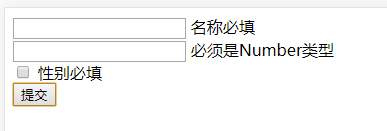
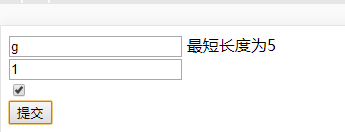
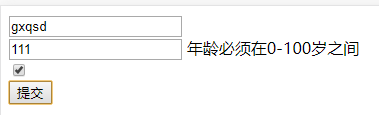
接下来来一张正确的时候
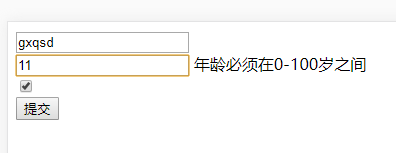 将111改为11,提交。
去百度了,因为我们在from的action设置的https://www.baidu.com。
到这基本算告一段落啦。但是聪明的你肯定发现了问题,这用起来确实方便了,也和之前后端验证有点模子了,但这毕竟是javascript啊 难道我从还得先定义一个Student 才能使用,万一服务端给我返回json数据呢?那怎么办,没关系我们来改改就是啦。看我们new StudentValidator 传递的是一个Student的构造函数进去,实际上我们知道在内部我们将new 了这个参数,创建了这个对象赋值给this.model,那我们直接传递个对象给他不就行了?干嘛要用这个Student啊,说改就改,
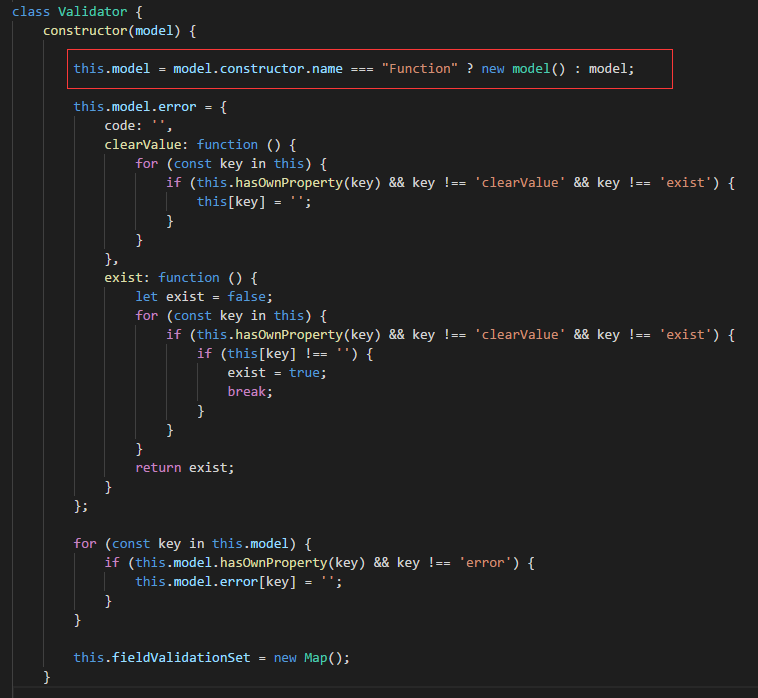
于是我通过判断传进来的model参数的构造函数名是否是“Function” 来判断model是构造函数还是一个对象,如果是对象的话直接赋值给this.model 如果是构造函数的话依旧new 出来。
这里model.constructor指向的是model的对象名。
比如var stu = new Student();
stu.constructor 指向的就是Student这个构造函数
甚至我们 var stu1 = new stu.constructor() 跟 var stu1 = new Student()效果是一模一样的。
而任何对象都默认继承自Function,啥意思呢就是我们的Student 其实是 Function对象的实例罢了,不仅他是就连我们Javascript中的所有内置对象都是,比如NUmber等。这里如果前端基础不太好的同学就不必太纠结啦。
总之经过改良我们现在在使用上已经可以直接传递一个Json对象啦。
1<!DOCTYPE html>
2<html lang="en">
3
4<head>
5    <meta charset="UTF-8">
6    <meta name="viewport" content="width=device-width, initial-scale=1.0">
7    <meta http-equiv="X-UA-Compatible" content="ie=edge">
8    <title>Document</title>
9    <script type="text/javascript" src="vue.js"></script>
10    <script src="validator.js"></script>
11</head>
12
13<body>
14    <div id="box">
15        <form action="https://www.baidu.com">
16            <div>
17                <input type="text" v-model="model.name">
18                <span>{{model.error.name}}</span>
19            </div>
20            <div>
21                <input type="text" v-model="model.age">
22                <span>{{model.error.age}}</span>
23            </div>
24            <div>
25                <input type="checkbox" v-model="model.sex">
26                <span>{{model.error.sex}}</span>
27            </div>
28            <input type="submit" value="提交" @click="submit({ev:$event})">
29        </form>
30    </div>
31    <script>
32
33        //  自定义验证
34        class StudentValidator extends Validator {
35            constructor(typeName) {
36                super(typeName);
37                this.ruleFor("name")
38                    .NotEmpty()
39                    .WithMessage("名称必填")
40                    .MinimumLength(5)
41                    .WithMessage("最短长度为5");
42
43                this.ruleFor("age")
44                    .NotEmpty()
45                    .WithMessage("年龄必须")
46                    .Number(0, 100)
47                    .WithMessage("年龄必须在0-100岁之间");
48
49                this.ruleFor("sex")
50                    .NotEmpty()
51                    .WithMessage("性别必填")
52                    .Must(m => !m.sex)
53                    .WithMessage("gxq is a man");
54            }
55        }
56        let vm = new Vue({
57            el: '#box',
58            data: {
59                validator: new StudentValidator({ name: undefined, age: undefined, sex: undefined }),
60            },
61            methods: {
62                submit: function ({ ev }) {
63
64                    if (this.validator.passValidation()) {
65                        return;
66                    }
67
68                    ev.preventDefault();
69
70                    this.validator.validation(ev.target);
71                }
72            },
73            computed: {
74                model: {
75                    get: function () {
76                        return this.validator.model;
77                    }
78                }
79            }
80        });
81
82    </script>
83</body>
84
85</html>
像这样我们的需要验证的对象可以是一个json了,使用起来,是不是方便多啦?
但有的同学发现了,你这个使用起来还需要定义一个StudentValidator,这多麻烦啊,或者我对class不太熟悉,我想直接使用行不行?
既然有这样的需求,那我们就来分析实现的可行性和思路。
首先我们看到StudentValidator 继承自 Validator,在构造方法里,他实际上仅做了配置的事,配置工作调用的还是Validator的方法。
所以,其实我们要不要StudentValidator都没关系啊,我们可以直接new 一个Validator 然后在去调用他的 ruleFor 等一系列方法来完成嘛。
但这样的话又需要var vali = new Validator了,而且还要一个一个去调用,vali.ruleFor("name").NotEmpty().WithMessage(""); vall.ruleFor("age").Number().WithMessage("")。这也太麻烦了。
其实啊,我们可以传一个回调函数进去,在这个回调函数里进行配置,但回调函数里无法调用Validator的方法啊,那我们就定义一个参数,我们希望通过this.ruleFor,但this 是关键字无法作为参数名,那我们就叫than吧。
经过改造,我们把Validator的constructor改成了这样
1constructor({ model, rule = undefined }) {
2
3        this.fieldValidationSet = new Map();
4
5        if (rule.constructor.name === "Function") {
6            rule(this);
7        }
8
9        this.model = model.constructor.name === "Function" ? new model() : model;
10
11        this.model.error = {
12            code: '',
13            clearValue: function () {
14                for (const key in this) {
15                    if (this.hasOwnProperty(key) && key !== 'clearValue' && key !== 'exist') {
16                        this[key] = '';
17                    }
18                }
19            },
20            exist: function () {
21                let exist = false;
22                for (const key in this) {
23                    if (this.hasOwnProperty(key) && key !== 'clearValue' && key !== 'exist') {
24                        if (this[key] !== '') {
25                            exist = true;
26                            break;
27                        }
28                    }
29                }
30                return exist;
31            }
32        };
33
34        for (const key in this.model) {
35            if (this.model.hasOwnProperty(key) && key !== 'error') {
36                this.model.error[key] = '';
37            }
38        }
39
40
41
42    }
很简单,在Validator里把当前this 作为参数传给回调函数,这样,我们在配置的时候就能在回调函数中使用这个"this"了。经过改进我们的页面变成什么样了呢?
1<script>
2        let vm = new Vue({
3            el: '#box',
4            data: {
5                validator: new Validator({
6                    model: { name: undefined, age: undefined, sex: undefined },
7                    rule: function (than) {
8                        than.ruleFor("name")
9                            .NotEmpty()
10                            .WithMessage("名称必填")
11                            .MinimumLength(5)
12                            .WithMessage("最短长度为5");
13
14                        than.ruleFor("age")
15                            .NotEmpty()
16                            .WithMessage("年龄必须")
17                            .Number(0, 100)
18                            .WithMessage("必须在0-100岁之间");
19                    }
20                }),
21            },
22            methods: {
23                submit: function ({ ev }) {
24
25                    if (this.validator.passValidation()) {
26                        return;
27                    }
28
29                    ev.preventDefault();
30
31                    this.validator.validation(ev.target);
32                }
33            },
34            computed: {
35                model: {
36                    get: function () {
37                        return this.validator.model;
38                    }
39                }
40            }
41        });
42    </script>
这样在一看是不是简单了许多啊?