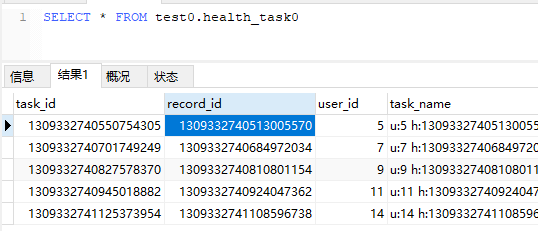
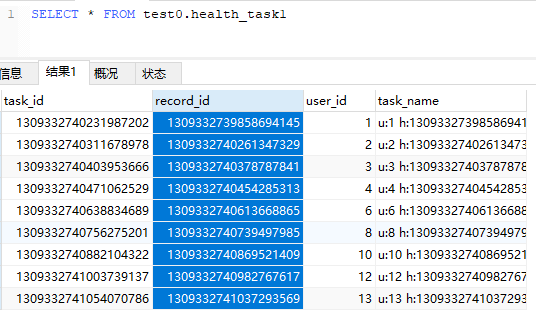
代码同上篇一致,只是配置文件不同。我们主要看一下,配置文件。
分表配置
由于的单库分表,所以只配置一个数据源就可以了
1#配置数据源
2spring.shardingsphere.datasource.names=test0
3#test0
4spring.shardingsphere.datasource.test0.type=com.zaxxer.hikari.HikariDataSource
5spring.shardingsphere.datasource.test0.driver-class-name=com.mysql.cj.jdbc.Driver
6spring.shardingsphere.datasource.test0.jdbcUrl=jdbc:mysql://127.0.0.1:3306/test0
7spring.shardingsphere.datasource.test0.username=devadmin
8spring.shardingsphere.datasource.test0.password=
设置绑定表
1# 设置绑定表
2spring.shardingsphere.sharding.binding-tables[0]=health_record,health_task
设置分表的策略
这里根据 record_id 奇偶来分表的。分为 health_record0,health_record1 和 health_task0,health_task1
1# health_record
2spring.shardingsphere.sharding.tables.health_record.actual-data-nodes=test0.health_record$->{0..1}
3spring.shardingsphere.sharding.tables.health_record.table-strategy.inline.algorithm-expression=health_record$->{record_id % 2}
4spring.shardingsphere.sharding.tables.health_record.table-strategy.inline.sharding-column=record_id
5spring.shardingsphere.sharding.tables.health_record.key-generator.column=record_id
6spring.shardingsphere.sharding.tables.health_record.key-generator.type=SNOWFLAKE
7# health_task
8spring.shardingsphere.sharding.tables.health_task.actual-data-nodes=test0.health_task$->{0..1}
9spring.shardingsphere.sharding.tables.health_task.table-strategy.inline.algorithm-expression=health_task$->{record_id %2}
10spring.shardingsphere.sharding.tables.health_task.table-strategy.inline.sharding-column=record_id
11spring.shardingsphere.sharding.tables.health_task.key-generator.column=task_id
12spring.shardingsphere.sharding.tables.health_task.key-generator.type=SNOWFLAKE
完整配置
1server.port=8080
2#打印sql
3spring.shardingsphere.props.sql.show=true
4#配置数据源
5spring.shardingsphere.datasource.names=test0
6#test0
7spring.shardingsphere.datasource.test0.type=com.zaxxer.hikari.HikariDataSource
8spring.shardingsphere.datasource.test0.driver-class-name=com.mysql.cj.jdbc.Driver
9spring.shardingsphere.datasource.test0.jdbcUrl=jdbc:mysql://127.0.0.1:3306/test0
10spring.shardingsphere.datasource.test0.username=devadmin
11spring.shardingsphere.datasource.test0.password=
12
13
14# 设置绑定表
15spring.shardingsphere.sharding.binding-tables[0]=health_record,health_task
16# health_record
17spring.shardingsphere.sharding.tables.health_record.actual-data-nodes=test0.health_record$->{0..1}
18spring.shardingsphere.sharding.tables.health_record.table-strategy.inline.algorithm-expression=health_record$->{record_id % 2}
19spring.shardingsphere.sharding.tables.health_record.table-strategy.inline.sharding-column=record_id
20spring.shardingsphere.sharding.tables.health_record.key-generator.column=record_id
21spring.shardingsphere.sharding.tables.health_record.key-generator.type=SNOWFLAKE
22# health_task
23spring.shardingsphere.sharding.tables.health_task.actual-data-nodes=test0.health_task$->{0..1}
24spring.shardingsphere.sharding.tables.health_task.table-strategy.inline.algorithm-expression=health_task$->{record_id %2}
25spring.shardingsphere.sharding.tables.health_task.table-strategy.inline.sharding-column=record_id
26spring.shardingsphere.sharding.tables.health_task.key-generator.column=task_id
27spring.shardingsphere.sharding.tables.health_task.key-generator.type=SNOWFLAKE
数据库如下
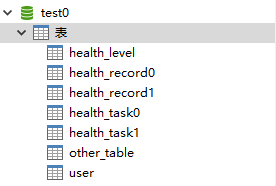
health_level 数据如下
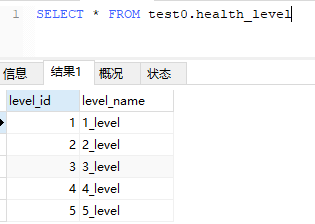
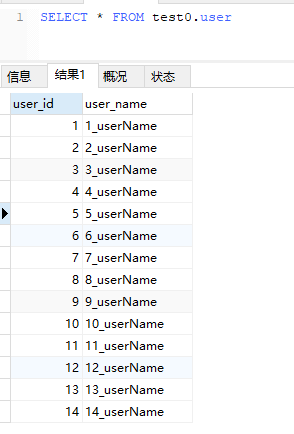
user数据如下
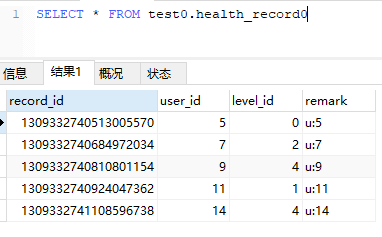
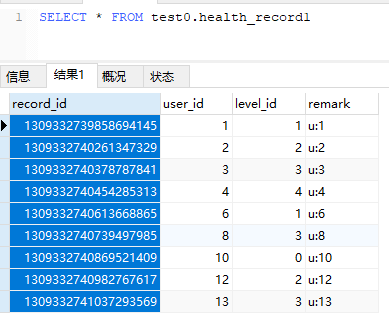
health_record0,health_record1
health_record0 中 record_id 都是偶数 ,health_record1 都是奇数
health_task0,health_task1
health_task0 中 record_id 都是偶数 ,health_task1 都是奇数