
-------------------------注解扫面的bean的ID问题--------------------------
0.前提需要明白注解扫描出来的bean的id默认是类名首字母小写,当然可以指定id:
(1)只写注解不指定id
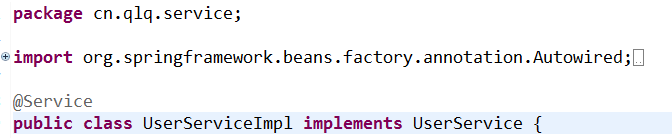
上面实际上是等价于xml中的下面配置:
<bean id="userServiceImpl" class="cn.qlq.service.UserService"></bean>
测试:(程序中获取spring容器中的bean)
1@Action("saveUser")
2    public String saveUser() {
3        userService.saveUser();
4        // 代码中获取容器中bean(依赖于web容器)
5        WebApplicationContext wac = ContextLoader.getCurrentWebApplicationContext();
6        Object bean = wac.getBean("userServiceImpl");
7        return "json";
8    }
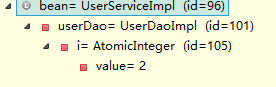
打断点查看bean:(获取到的是容器中的唯一bean的引用,且此对象的依赖关系也会取出来)
(2)指定id****属性:
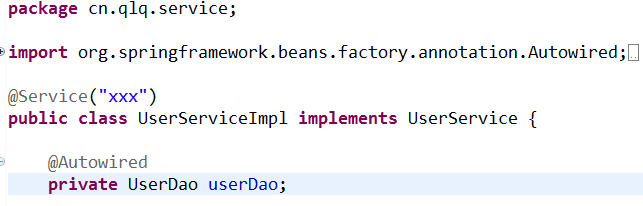
上面等价于:
<bean id="xxx" class="cn.qlq.service.UserService"></bean>
测试代码:
1@Action("saveUser")
2    public String saveUser() {
3        userService.saveUser();
4        // 代码中获取容器中bean(依赖于web容器)
5        WebApplicationContext wac = ContextLoader.getCurrentWebApplicationContext();
6        Object bean = wac.getBean("xxx");
7        return "json";
8    }
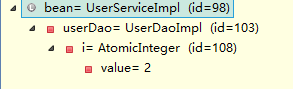
打断点查看bean:
(3)按照上面的思路,我们在不同的包下如果不指定id是不允许有类名字相同的类存在的,测试
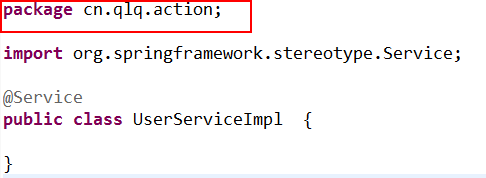
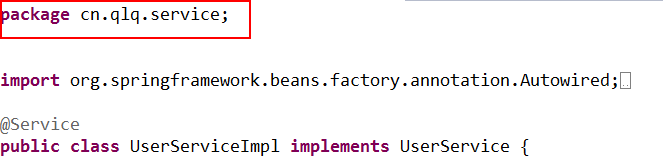
启动容器报错:(注解冲突)
1org.springframework.beans.factory.BeanDefinitionStoreException: Unexpected exception parsing XML document from class path resource [applicationContext.xml]; nested exception is java.lang.IllegalStateException: Annotation-specified bean name 'userServiceImpl' for bean class [cn.qlq.service.UserServiceImpl] conflicts with existing, non-compatible bean definition of same name and class [cn.qlq.action.UserServiceImpl]
2    at org.springframework.beans.factory.xml.XmlBeanDefinitionReader.doLoadBeanDefinitions(XmlBeanDefinitionReader.java:412)
3    at org.springframework.beans.factory.xml.XmlBeanDefinitionReader.loadBeanDefinitions(XmlBeanDefinitionReader.java:334)
4    at org.springframework.beans.factory.xml.XmlBeanDefinitionReader.loadBeanDefinitions(XmlBeanDefinitionReader.java:302)
5    at org.springframework.beans.factory.support.AbstractBeanDefinitionReader.loadBeanDefinitions(AbstractBeanDefinitionReader.java:143)
6    at org.springframework.beans.factory.support.AbstractBeanDefinitionReader.loadBeanDefinitions(AbstractBeanDefinitionReader.java:178)
7    at org.springframework.beans.factory.support.AbstractBeanDefinitionReader.loadBeanDefinitions(AbstractBeanDefinitionReader.java:149)
8    at org.springframework.web.context.support.XmlWebApplicationContext.loadBeanDefinitions(XmlWebApplicationContext.java:124)
9    at org.springframework.web.context.support.XmlWebApplicationContext.loadBeanDefinitions(XmlWebApplicationContext.java:93)
10    at org.springframework.context.support.AbstractRefreshableApplicationContext.refreshBeanFactory(AbstractRefreshableApplicationContext.java:130)
11    at org.springframework.context.support.AbstractApplicationContext.obtainFreshBeanFactory(AbstractApplicationContext.java:467)
12    at org.springframework.context.support.AbstractApplicationContext.refresh(AbstractApplicationContext.java:397)
13    at org.springframework.web.context.ContextLoader.createWebApplicationContext(ContextLoader.java:276)
14    at org.springframework.web.context.ContextLoader.initWebApplicationContext(ContextLoader.java:197)
15    at org.springframework.web.context.ContextLoaderListener.contextInitialized(ContextLoaderListener.java:47)
16    at org.apache.catalina.core.StandardContext.listenerStart(StandardContext.java:5118)
17    at org.apache.catalina.core.StandardContext.startInternal(StandardContext.java:5634)
18    at org.apache.catalina.util.LifecycleBase.start(LifecycleBase.java:145)
19    at org.apache.catalina.core.ContainerBase.addChildInternal(ContainerBase.java:899)
20    at org.apache.catalina.core.ContainerBase.addChild(ContainerBase.java:875)
21    at org.apache.catalina.core.StandardHost.addChild(StandardHost.java:652)
22    at org.apache.catalina.startup.HostConfig.deployDescriptor(HostConfig.java:679)
23    at org.apache.catalina.startup.HostConfig$DeployDescriptor.run(HostConfig.java:1966)
24    at java.util.concurrent.Executors$RunnableAdapter.call(Executors.java:471)
25    at java.util.concurrent.FutureTask.run(FutureTask.java:262)
26    at java.util.concurrent.ThreadPoolExecutor.runWorker(ThreadPoolExecutor.java:1145)
27    at java.util.concurrent.ThreadPoolExecutor$Worker.run(ThreadPoolExecutor.java:615)
28    at java.lang.Thread.run(Thread.java:745)
----------------研究Autowired和Resource两者不同----------------
@Resource和@Autowired都是做bean的注入时使用,其实@Resource并不是Spring的注解,它的包是javax.annotation.Resource,需要导入,但是Spring支持该注解的注入。
1、共同点
两者都可以写在字段和setter方法上。两者如果都写在字段上,那么就不需要再写setter方法。
2、不同点
(1)@Autowired
查看源码:
1package org.springframework.beans.factory.annotation;
2
3import java.lang.annotation.ElementType;
4import java.lang.annotation.Retention;
5import java.lang.annotation.RetentionPolicy;
6import java.lang.annotation.Target;
7
8@Retention(RetentionPolicy.RUNTIME)
9@Target({ElementType.CONSTRUCTOR, ElementType.FIELD, ElementType.METHOD})
10public @interface Autowired {
11    boolean required() default true;
12}
@Autowired为Spring提供的注解,需要导入包org.springframework.beans.factory.annotation.Autowired;只按照byType注入。
1public class TestServiceImpl {
2    // 下面两种@Autowired只要使用一种即可
3    @Autowired
4    private UserDao userDao; // 用于字段上
5
6    @Autowired
7    public void setUserDao(UserDao userDao) { // 用于属性的方法上
8        this.userDao = userDao;
9    }
10}
@Autowired注解是按照类型(byType)装配依赖对象,默认情况下它要求依赖对象必须存在,如果允许null值,可以设置它的required属性为false。如果我们想使用按照名称(byName)来装配,可以结合@Qualifier注解一起使用。如下:
1public class TestServiceImpl {
2    @Autowired
3    @Qualifier("userDao")
4    private UserDao userDao;
5}
当然,您也可以通过 @Autowired 对方法或构造函数进行标注,如果构造函数有两个入参,分别是 bean1 和 bean2,@Autowired 将分别寻找和它们类型匹配的 Bean,将它们作为 CountryService (Bean1 bean1 ,Bean2 bean2) 的入参来创建 CountryService Bean。来看下面的代码: 对方法
1public class Boss {
2    private Car car;
3    private Office office;
4
5     @Autowired
6    public void setCar(Car car) {
7        this.car = car;
8    }
9
10    @Autowired
11    public void setOffice(Office office) {
12        this.office = office;
13    }
14    …
15}
这时,@Autowired 将查找被标注的方法的入参类型的 Bean,并调用方法自动注入这些 Bean。而下面的使用方法则对构造函数进行标注:
1public class Boss {
2    private Car car;
3    private Office office;
4
5    @Autowired
6    public Boss(Car car ,Office office){
7        this.car = car;
8        this.office = office ;
9    }
10
11    …
12}
(2)@Resource
查看源码:
1package javax.annotation;
2
3import java.lang.annotation.*;
4import static java.lang.annotation.ElementType.*;
5import static java.lang.annotation.RetentionPolicy.*;
6
7@Target({TYPE, FIELD, METHOD})
8@Retention(RUNTIME)
9public @interface Resource {
10
11    String name() default "";
12
13    String lookup() default "";
14
15    Class type() default java.lang.Object.class;
16
17
18    enum AuthenticationType {
19            CONTAINER,
20            APPLICATION
21    }
22
23    AuthenticationType authenticationType() default AuthenticationType.CONTAINER;
24
25    boolean shareable() default true;
26
27    String mappedName() default "";
28
29    String description() default "";
30}
@Resource的作用相当于@Autowired,只不过@Autowired按byType自动注入,而@Resource默认按 byName自动注入罢了。@Resource有两个属性是比较重要的,分是name和type,Spring将@Resource注解的name属性解析为bean的名字,而type属性则解析为bean的类型。所以如果使用name属性,则使用byName的自动注入策略,而使用type属性时则使用byType自动注入策略。如果既不指定name也不指定type属性,这时将通过反射机制使用byName自动注入策略。
注:最好是将@Resource放在setter方法上,因为这样更符合面向对象的思想,通过set、get去操作属性,而不是直接去操作属性。
@Resource装配顺序:
①如果同时指定了name和type,则从Spring上下文中找到唯一匹配的bean进行装配,找不到则抛出异常。
②如果指定了name,则从上下文中查找名称(id)匹配的bean进行装配,找不到则抛出异常。
③如果指定了type,则从上下文中找到类似匹配的唯一bean进行装配,找不到或是找到多个,都会抛出异常。
④如果既没有指定name,又没有指定type,则自动按照byName方式进行装配;如果没有匹配,则回退为一个原始类型进行匹配,如果匹配则自动装配。
例如以下写法都对:(当然下面只是写在成员变量中,也可以写在set方法上)
1@Resource(type = cn.qlq.service.UserService.class)
2    private UserService userService;
3
4@Resource(name="userServiceImpl")
5    private UserService userService;
6
7    @Resource
8    private UserService userService;
总结:
- @Resource默认按照名称方式进行bean匹配(byName),@Autowired默认按照类型方式进行bean匹配(byType)
- @Resource(import javax.annotation.Resource;)是J2EE的注解,@Autowired( import org.springframework.beans.factory.annotation.Autowired;)是Spring的注解
Spring属于第三方的,J2EE是Java自己的东西。使用@Resource可以减少代码和Spring之间的耦合
----------------程序中获取spring容器中对象----------------
我们知道在spring中容器启动有BeanFactory和ApplicationContext(其实现有ClassPathXmlApplicationContext、FileSystemXmlApplicationContext 、XmlWebApplicationContext、AnnotationConfigApplicationContext四种基本是),所以我们首先获取到ApplicationContext,然后获取对象:(可以根据类型获取,也可以根据bean的Id获取)
1// 获取webApplicationContext进而获取对象
2        WebApplicationContext currentWebApplicationContext = ContextLoader.getCurrentWebApplicationContext();
3        TestUtils bean = currentWebApplicationContext.getBean(TestUtils.class);// 根据类型获取对象
4        UserService bean2 = (UserService) currentWebApplicationContext.getBean("userService");// 根据id获取
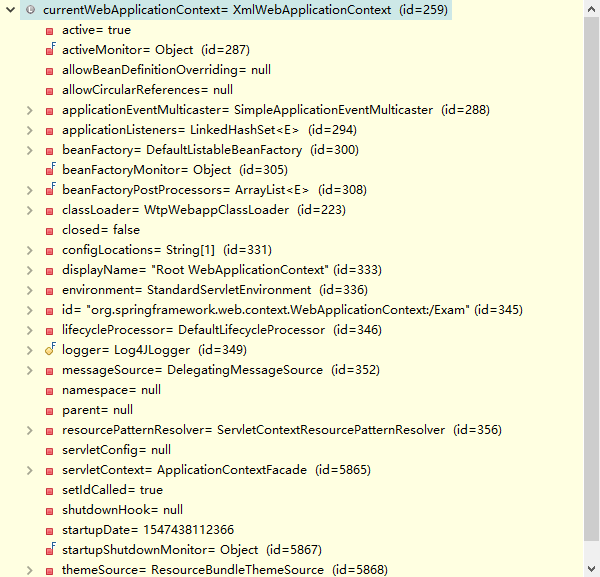
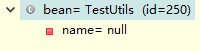
我们打断点查看上面获取的bean:
(1)currentWebApplicationContext是取的XmlWebApplicationContext
(2)bean是获取容器的原生对象(通过IOC反射创建的)
(3)bean2是获取的AOP增强的代理对象。
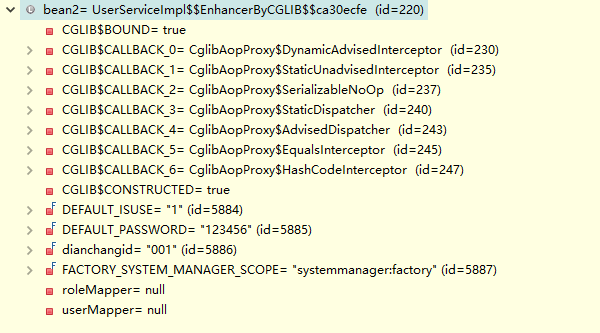
通过上面明白了spring ioc默认的都是原生对象 只有通过aop增强的对象才是代理对象。代理对象也是在原来的反射创建的对象上进行增强。
实际上在web应用中,我们的dao层用的ORM框架,例如mybatis、hibernate与spring整合之后都获取的是增强过的代理对象;我们的service层一般也会用aop增强事务等操作。