二、基于内存的用户、URL权限配置
1、用户角色配置
(1)我们可以通过自定义类继承 WebSecurityConfigurerAdapter,从而实现对 Spring Security 更多的自定义配置。比如下面样例我们就配置了两个用户,以及他们对应的角色。
注意:基于内存的用户配置在配置角色时不需要添加“ROLE_”前缀,而下文介绍的基于数据库的认证配置角色时需要添加“ROLE_”前缀。
1@Configuration
2public class MyWebSecurityConfig extends WebSecurityConfigurerAdapter {
3    // 指定密码的加密方式
4    @SuppressWarnings("deprecation")
5    @Bean
6    PasswordEncoder passwordEncoder(){
7        // 不对密码进行加密
8        return NoOpPasswordEncoder.getInstance();
9    }
10
11    // 配置用户及其对应的角色
12    @Override
13    protected void configure(AuthenticationManagerBuilder auth) throws Exception {
14        auth.inMemoryAuthentication()
15                .withUser("admin").password("123").roles("ADMIN","USER")
16                .and()
17                .withUser("hangge").password("123").roles("USER");
18    }
19}
(2)配置完成后,重启项目,就可以使用这两个用户进行登录了。
2、配置 URL 访问权限
(1)上面配置完毕后受保护的资源都是默认的(不同角色访问权限也没有什么不同),而真正项目中我们需要根据实际情况进行角色管理。要实现这个功能只需重写 WebSecurityConfigurerAdapter 中的另一个方法即可:
第 30 行代码说明:
- formLogin() 方法表示开启表单登录,即我们之前看到的登录页面。
- loginProcessingUrl() 方法配置登录接口为“/login”,即可以直接调用“/login”接口,发起一个 POST 请求进行登录,登录参数中用户名必须为 username,密码必须为 password,配置 loginProcessingUrl 接口主要是方便 Ajax 或者移动端调用登录接口。
- permitAll() 表示和登录相关的接口都不需要认证即可访问。
1@Configuration
2public class MyWebSecurityConfig extends WebSecurityConfigurerAdapter {
3    // 指定密码的加密方式
4    @SuppressWarnings("deprecation")
5    @Bean
6    PasswordEncoder passwordEncoder(){
7        // 不对密码进行加密
8        return NoOpPasswordEncoder.getInstance();
9    }
10
11    // 配置用户及其对应的角色
12    @Override
13    protected void configure(AuthenticationManagerBuilder auth) throws Exception {
14        auth.inMemoryAuthentication()
15        .withUser("root").password("123").roles("ADMIN","DBA")
16        .and()
17        .withUser("admin").password("123").roles("ADMIN","USER")
18        .and()
19        .withUser("hangge").password("123").roles("USER");
20    }
21
22    // 配置 URL 访问权限
23    @Override
24    protected  void configure(HttpSecurity http) throws Exception {
25        http.authorizeRequests() // 开启 HttpSecurity 配置
26            .antMatchers("/admin/**").hasRole("ADMIN") // admin/** 模式URL必须具备ADMIN角色
27            .antMatchers("/user/**").access("hasAnyRole('ADMIN','USER')") // 该模式需要ADMIN或USER角色
28            .antMatchers("/db/**").access("hasRole('ADMIN') and hasRole('DBA')") // 需ADMIN和DBA角色
29            .anyRequest().authenticated() // 用户访问其它URL都必须认证后访问(登录后访问)
30            .and().formLogin().loginProcessingUrl("/login").permitAll() // 开启表单登录并配置登录接口
31            .and().csrf().disable(); // 关闭csrf
32    }
33}
(2)接着在 Conctoller 中添加如下接口进行测试:
1@RestController
2public class HelloController {
3
4    @GetMapping("/admin/hello")
5    public String admin() {
6        return "hello admin";
7    }
8
9    @GetMapping("/user/hello")
10    public String user() {
11        return "hello user";
12    }
13
14    @GetMapping("/db/hello")
15    public String db() {
16        return "hello db";
17    }
18
19    @GetMapping("/hello")
20    public String hello() {
21        return "hello";
22    }
23}
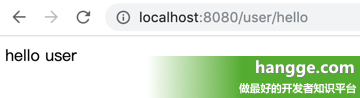
(3)接下来测试一下,我们使用 admin 用户进行登录,由于该用户具有 ADMIN 和 USER 这两个角色,所以登录后可以访问 /hello、/admin/hello 以及 /user/hello 这三个接口。
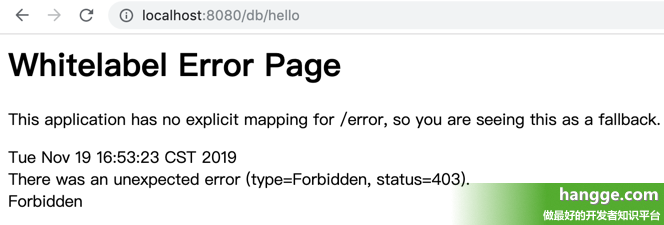
(4)而由于 /db/hello 接口同时需要 ADMIN 和 DBA 角色,因此 admin 用户仍然无法访问。