
前言
在 《一篇带你用 VuePress + Github Pages 搭建博客》中,我们使用 VuePress 搭建了一个博客,最终的效果查看:TypeScript 中文文档。
在搭建博客的过程中,我们出于实际的需求,在《VuePress 博客优化之拓展 Markdown 语法》中讲解了如何写一个 markdown-it插件,又在 《markdown-it 原理解析》中讲解了 markdown-it的执行原理,本篇我们将讲解具体的实战代码,帮助大家更好的写插件。
markdown-it-inline
markdown-it 的作者提供了 markdown-it-inine 用于方便修改 inline tokens 。举个例子,如果我们给所有的链接添加 target="_blank",正常你需要这样写:
1// Remember old renderer, if overridden, or proxy to default renderer
2var defaultRender = md.renderer.rules.link_open || function(tokens, idx, options, env, self) {
3  return self.renderToken(tokens, idx, options);
4};
5
6md.renderer.rules.link_open = function (tokens, idx, options, env, self) {
7  // If you are sure other plugins can't add `target` - drop check below
8  var aIndex = tokens[idx].attrIndex('target');
9
10  if (aIndex < 0) {
11    tokens[idx].attrPush(['target', '_blank']); // add new attribute
12  } else {
13    tokens[idx].attrs[aIndex][1] = '_blank';    // replace value of existing attr
14  }
15
16  // pass token to default renderer.
17  return defaultRender(tokens, idx, options, env, self);
18};
使用markdown-it-for-inline 后:
1var iterator = require('markdown-it-for-inline');
2
3var md = require('markdown-it')()
4            .use(iterator, 'url_new_win', 'link_open', function (tokens, idx) {
5              var aIndex = tokens[idx].attrIndex('target');
6
7              if (aIndex < 0) {
8                tokens[idx].attrPush(['target', '_blank']);
9              } else {
10                tokens[idx].attrs[aIndex][1] = '_blank';
11              }
12            });
如果我们要替换掉某个文字,也可以使用 markdown-it-for-inline:
1var iterator = require('markdown-it-for-inline');
2
3// plugin params are:
4//
5// - rule name (should be unique)
6// - token type to apply
7// - function
8//
9var md = require('markdown-it')()
10            .use(iterator, 'foo_replace', 'text', function (tokens, idx) {
11              tokens[idx].content = tokens[idx].content.replace(/foo/g, 'bar');
12            });
markdown-it-container
Plugin for creating block-level custom containers for markdown-it markdown parser.
markdown-it 的作者同样提供了 markdown-it-container 用于快速创建块级自定义容器。
有了这个插件,你可以这样使用 markdown 语法:
1::: spoiler click me
2*content*
3:::
注意这其中的 ::: 是插件定义的语法,它会取出 ::: 后的字符,在这个例子中是 warning,并提供方法自定义渲染结果:
1var md = require('markdown-it')();
2
3md.use(require('markdown-it-container'), 'spoiler', {
4
5  validate: function(params) {
6    return params.trim().match(/^spoiler\s+(.*)$/);
7  },
8
9  render: function (tokens, idx) {
10    // 通过 tokens[idx].info.trim() 取出 'click me' 字符串
11    var m = tokens[idx].info.trim().match(/^spoiler\s+(.*)$/);
12
13    // 开始标签的 nesting 为 1,结束标签的 nesting 为 -1
14    if (tokens[idx].nesting === 1) {
15      // 开始标签
16      return '<details><summary>' + md.utils.escapeHtml(m[1]) + '</summary>\n';
17    } else {
18      // 结束标签
19      return '</details>\n';
20    }
21  }
22});
最终渲染的结果为:
1<details><summary>click me</summary>
2<p><em>content</em></p>
3</details>
像 VuePress 提供了自定义容器:
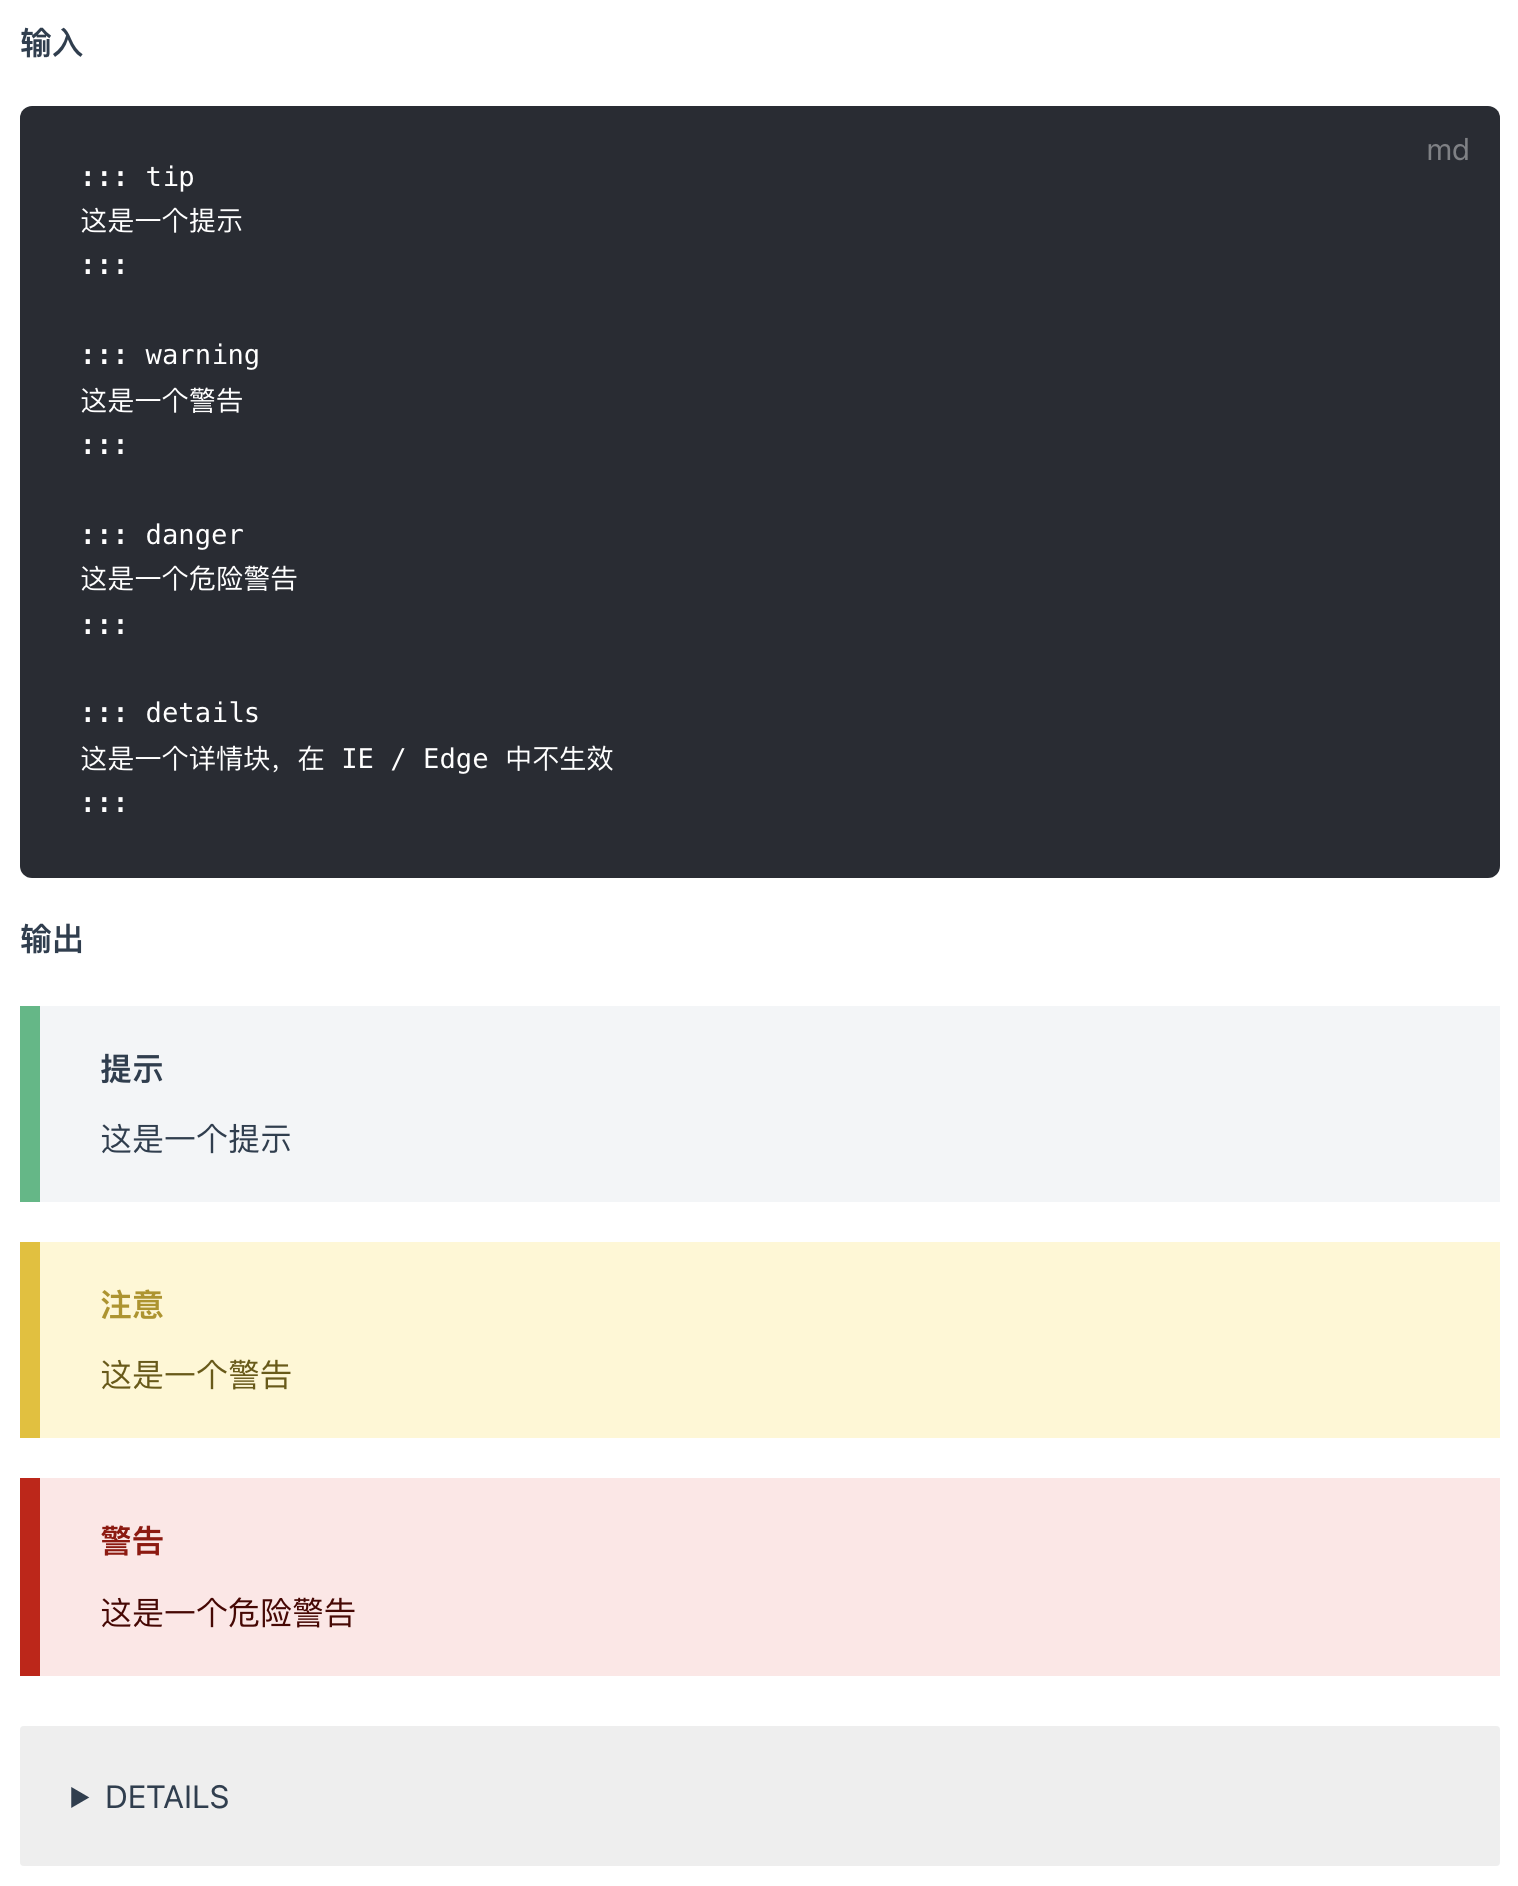
其实就是用 markdown-it-container 实现的,其实现源码为:
1const container = require('markdown-it-container')
2
3module.exports = md => {
4  md
5    .use(...createContainer('tip', 'TIP'))
6    .use(...createContainer('warning', 'WARNING'))
7    .use(...createContainer('danger', 'WARNING'))
8		// ...
9}
10
11function createContainer (klass, defaultTitle) {
12  return [container, klass, {
13    render (tokens, idx) {
14      const token = tokens[idx]
15      const info = token.info.trim().slice(klass.length).trim()
16      if (token.nesting === 1) {
17        return `<div class="${klass} custom-block"><p class="custom-block-title">${info || defaultTitle}</p>\n`
18      } else {
19        return `</div>\n`
20      }
21    }
22  }]
23}
系列文章
博客搭建系列是我至今写的唯一一个偏实战的系列教程,预计 20 篇左右,讲解如何使用 VuePress 搭建、优化博客,并部署到 GitHub、Gitee、私有服务器等平台。本篇为第 18 篇,全系列文章地址:https://github.com/mqyqingfeng/Blog
微信:「mqyqingfeng」,加我进冴羽唯一的读者群。
如果有错误或者不严谨的地方,请务必给予指正,十分感谢。如果喜欢或者有所启发,欢迎 star,对作者也是一种鼓励。