
上一篇博文中,我们介绍了如何搭建一个Eureka服务的架构,但是服务提供者我们只用了一个单例,完全不能体现高并发高可用。本文我们尝试在上一篇文章示例Eureka项目的基础上继续完善,让它可以做到一个集群的部署。
Eureka集群架构
我们先看一下我们这次示例打算改造成的架构图:
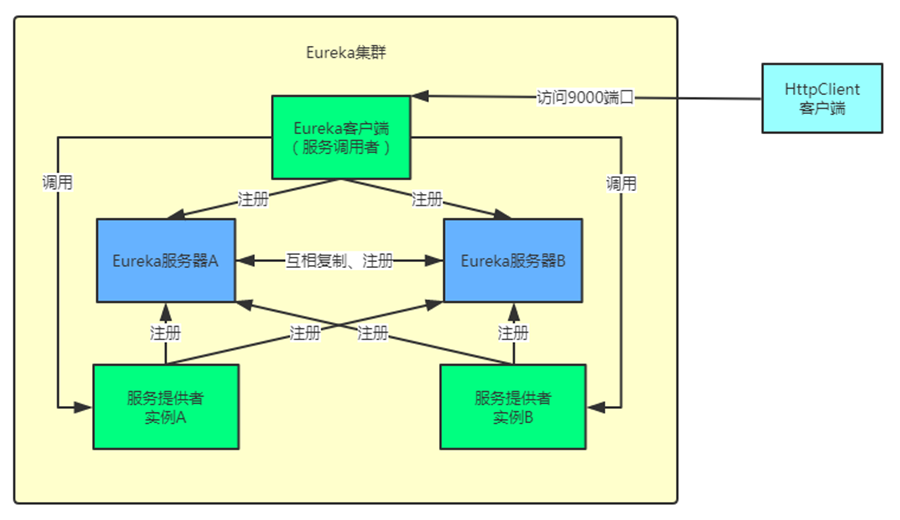
在我们的Eureka服务器里面会启动两个实例,这两个实例会相互注册。
然后服务提供者也会启动两个实例,这两个实例都会注册到我们服务器的两个实例,是的,像图中那样一个服务提供者实例分别向两个服务器实例注册。
服务调用者也会注册到两个服务器实例上面。
最后我们会编写一个Rest客户端,去调用服务调用者的站点端口,来测试服务调用的过程。
我们还用上文的比方继续比喻,Eureka服务器相当于114电话查询平台,而两个Eureka服务器实例相当于两个114接线员。某某酒店现在要提供电话服务,于是在114注册,它就是服务提供者。由于业务扩大,十分繁忙,我们需要提供接听电话的效率和及时性,类似于服务提供者需要高并发高可用,于是酒店也弄了两个接线员,相当于两个服务提供者实例。而一个客户想请求酒店服务,首先回去114查询这家酒店的电话,但是114是哪位接线员提供的服务信息和电话号码,我们不关心;同样,客户拿到酒店电话后,自行打电话给酒店,至于酒店是哪位客服接电话的,客户也不关心,反正联系到酒店了。
Eureka集群项目配置
模拟准备
由于我们是在本地电脑上模拟有这么个集群,所以我们需要在host文件里做个配置:
我们打开C:\Windows\System32\drivers\etc\host,加入下面这行,假装我们有两个节点机器slave1和slave2。无论我们等会儿访问slave1或是slave2,其实访问的都是我本地的IP地址。
127.0.0.1 slave1 slave2
(本文出自oschina博主happyBKs的博文:https://my.oschina.net/happyBKs/blog/1631960)
Eureka服务器的集群配置
今天的架构中,需要两个Eureka实例,并且这两个Eureka服务器之间还相互注册了信息。所以我们需要修改一下上文中的Eureka服务器应用项目eurekaServer。
我们将eurekaServer项目的配置文件改成如下,注意我们配置了两个profile,当中用---分隔开,我们在启动springboot的应用时只要将对应的profile名称作为参数赋值给springboot程序就可以了。
之前的application.yml
1server:
2  port: 8761
3eureka:
4  client:
5    register-with-eureka: false
6    fetch-registry: false
现在我们改成:
配置了两个eureka,计划通过profile来标识它们,然后以profile作为启动参数来启动不同配置的eureka实例应用。这两个eureka分别向对方注册自己的信息。注意,我这里设置了不同的端口号。因为虽然看似它们的IP域名为slave1和slave2,其实是我本地模拟只有一台PC,没办法修改host文件假装是在两个IP的机器上,其实还是在一台机器上,所以端口号必须不同。真实生产有两台服务器,端口号不妨一样都设置为8761.
1server:
2  port: 8761
3spring:
4  profiles: eureka1
5eureka:
6  client:
7    service-url:
8      defaultZone: http://slave2:8762/eureka
9---
10server:
11  port: 8762
12spring:
13  profiles: eureka2
14eureka:
15  client:
16    service-url:
17      defaultZone: http://slave1:8761/eureka
18
19
注意,可以配置一个应用名称,通过配置项spring.application.name
启动类我们做个改动,我们希望输入一个profile参数,以按照配置中不同的profile来分别启动一个eureka实例。
1package com.happybks.demo;
2
3import java.util.Scanner;
4
5import org.springframework.boot.autoconfigure.SpringBootApplication;
6import org.springframework.boot.builder.SpringApplicationBuilder;
7import org.springframework.cloud.netflix.eureka.server.EnableEurekaServer;
8
9@SpringBootApplication
10@EnableEurekaServer
11public class EurekaServerApplication {
12
13    public static void main(String[] args) {
14    	Scanner sc=new Scanner(System.in);
15    	final String profile = sc.nextLine();
16    	new SpringApplicationBuilder(EurekaServerApplication.class).profiles(profile).run(args);
17    	sc.close();
18    }
19}
服务提供者客户端应用配置
application.yml配置文件
1spring:
2  application:
3    name: first-service-app
4eureka:
5  client:
6    service-url:
7      defaultZone: http://slave1:8761/eureka/,http://slave2:8761/eureka/
服务请求者first-service-app需要同时向两个eureka服务器发出注册信息,所以这里配置了两个eureka的地址信息,并且用逗号隔离开。
然后我们改写一下上一篇例子中的控制器和bean。
PetBean增加一个info字段。
1package com.happybks.beans;
2
3public class PetBean {
4	private String breedType;
5	private int age;
6	private double price;
7	private String info;
8	public String getBreedType() {
9		return breedType;
10	}
11	public void setBreedType(String breedType) {
12		this.breedType = breedType;
13	}
14	public int getAge() {
15		return age;
16	}
17	public void setAge(int age) {
18		this.age = age;
19	}
20	public double getPrice() {
21		return price;
22	}
23	public void setPrice(double price) {
24		this.price = price;
25	}
26	public String getInfo() {
27		return info;
28	}
29	public void setInfo(String info) {
30		this.info = info;
31	}
32	public PetBean() {
33
34	}
35	@Override
36	public String toString() {
37		return "PetBean [breedType=" + breedType + ", age=" + age + ", price=" + price + ", info=" + info + "]";
38	}
39
40}
控制器的接口方法增加一个servlet的request参数。(如有其它参数,可以继续追加在一起不要紧)通过reuqest获取请求的url地址,就可以知道别人发给自己的请求时的url地址,也就知道了自己的IP服务地址。这个信息我们存入petBean的info字段返回json中给前端,我们计划看看在一个eureka集群中,一会儿服务调用者向同一个服务的发送请求时,该服务的两个服务提供者实例谁来应答。
1package com.happybks.controllers;
2
3import javax.servlet.http.HttpServletRequest;
4
5import org.springframework.http.MediaType;
6import org.springframework.web.bind.annotation.GetMapping;
7import org.springframework.web.bind.annotation.RestController;
8
9import com.happybks.beans.PetBean;
10
11@RestController
12public class PetInfoController {
13
14	@GetMapping(value="/petinfo/findpet",produces=MediaType.APPLICATION_JSON_VALUE)
15	public PetBean findPet(HttpServletRequest request) {
16		PetBean petBean = new PetBean();
17		petBean.setBreedType("聪明机灵小柴犬");
18		petBean.setAge(1);
19		petBean.setPrice(50000);
20		petBean.setInfo(request.getRequestURL().toString());
21		return petBean;
22	}
23
24}
启动类:
这里我们秀另一种区别参数,可以借助于赋予不同的端口,而不是profile来启动多个实例。
1package com.happybks.providers;
2
3import java.util.Scanner;
4
5import org.springframework.boot.autoconfigure.SpringBootApplication;
6import org.springframework.boot.builder.SpringApplicationBuilder;
7import org.springframework.cloud.netflix.eureka.EnableEurekaClient;
8import org.springframework.context.annotation.ComponentScan;
9
10
11@SpringBootApplication
12@EnableEurekaClient
13@ComponentScan(basePackages = { "com.happybks.controllers" })
14public class ServiceProvider1Application {
15
16    public static void main(String[] args) {
17
18    	Scanner sc=new Scanner(System.in);
19    	String port=sc.nextLine();
20    	new SpringApplicationBuilder(ServiceProvider1Application.class).properties("server.port="+port).run(args);
21    	sc.close();
22    }
23}
配置服务调用者
这里我们沿用上次的控制器,一会儿我们请求这个控制器的方法url,它会向服务提供者发出一个请求。
1package com.happybks.controllers;
2
3import javax.servlet.http.HttpServletRequest;
4
5import org.springframework.cloud.client.loadbalancer.LoadBalanced;
6import org.springframework.context.annotation.Bean;
7import org.springframework.context.annotation.Configuration;
8import org.springframework.web.bind.annotation.GetMapping;
9import org.springframework.web.bind.annotation.PathVariable;
10import org.springframework.web.bind.annotation.RestController;
11import org.springframework.web.client.RestTemplate;
12
13@RestController
14@Configuration
15public class ShopperBehaviorController {
16
17	@Bean
18	@LoadBalanced
19	public RestTemplate getRestTemplate() {
20		return new RestTemplate();
21	}
22
23	@GetMapping("/shopper/routine")
24	public String routine() {
25		RestTemplate restTemplate = getRestTemplate();
26		String json = restTemplate.getForObject("http://first-service-app/petinfo/findpet", String.class);
27		return json;
28	}
29
30	@GetMapping("/shopper/getservice/{id}")
31	public String getservice(@PathVariable("id") Integer id, HttpServletRequest request) {
32		RestTemplate restTemplate = getRestTemplate();
33		String json = restTemplate.getForObject("http://first-service-app/petinfo/findpet", String.class);
34		System.out.println(request.getRequestURL().toString());
35		return json;
36	}
37}
启动类:
1package com.happybks.callers;
2
3import org.springframework.boot.SpringApplication;
4import org.springframework.boot.autoconfigure.SpringBootApplication;
5import org.springframework.cloud.netflix.eureka.EnableEurekaClient;
6import org.springframework.context.annotation.ComponentScan;
7
8@SpringBootApplication
9@ComponentScan(basePackages = { "com.happybks.controllers" })
10@EnableEurekaClient
11public class ServiceCaller1Application {
12
13	public static void main(String[] args) {
14		SpringApplication.run(ServiceCaller1Application.class, args);
15	}
16}
关于项目的其他代码和配置,请参见上一篇博客,我本文就不全部粘贴出来了。
启动集群
下面,我们来启动各个服务:
启动两个相互注册的EUREKA服务器实例
我们先启动profile为eureka1的服务器应用,控制台输入eureka1之后,eureka服务启动,启动好后,eureka1会按照配置主动向另一个eureka示例eureka2注册,但是此时eureka2的服务还没有启动,所以会报一个无法连接的错误。
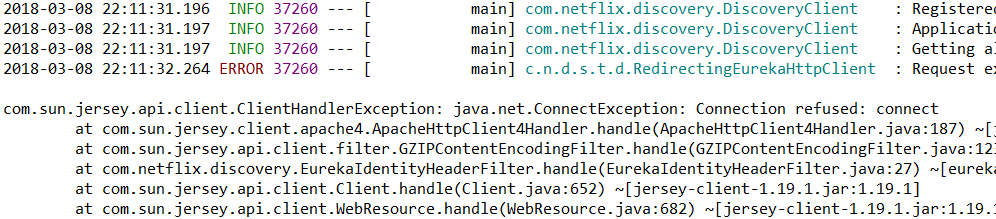
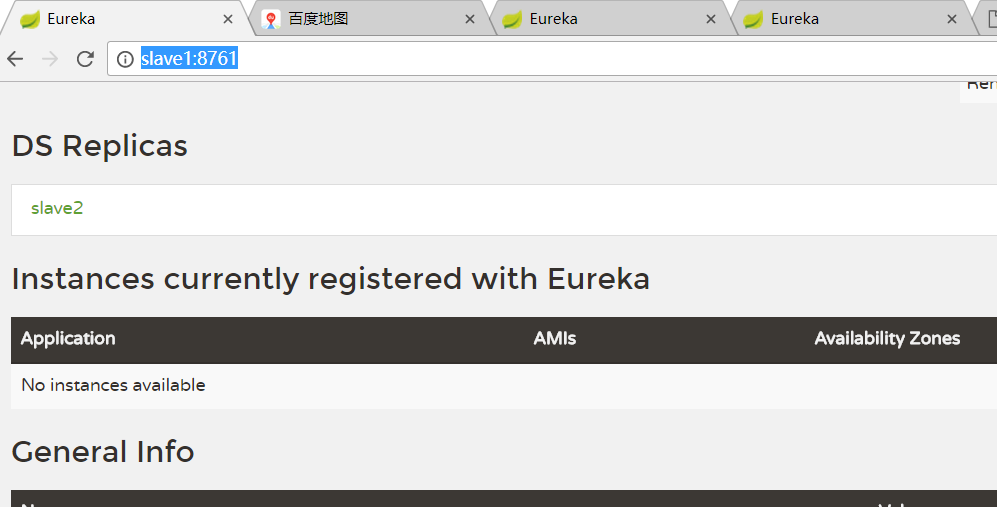
这个不要紧。我们访问eureka1的服务查看主页:http://slave1:8761/
可以看到我们配置的它会向slave2注册信息,等同于一个服务副本,所以看到DS Replicaas有一个slave2.
但是因为eureka2还没有起来,所以下面的实例列表里面什么都没有。
之后,我们启动eureka2的服务。
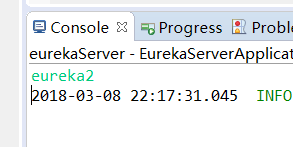
我们会发现此次eureka2启动没有报错
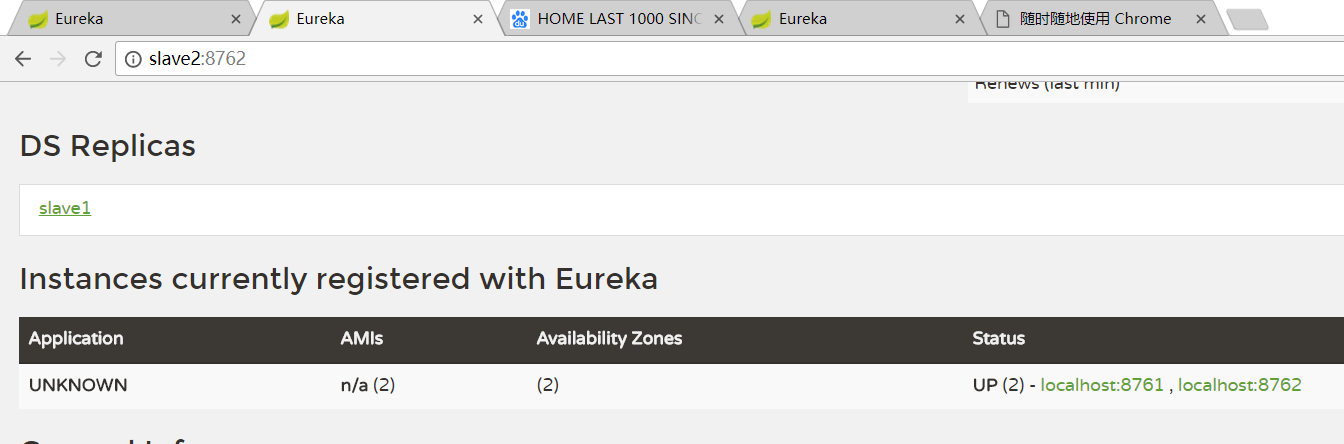
我们此时再看http://slave1:8761/,发现eureka1等到eureka2也启动之后,完成既定配置的注册。
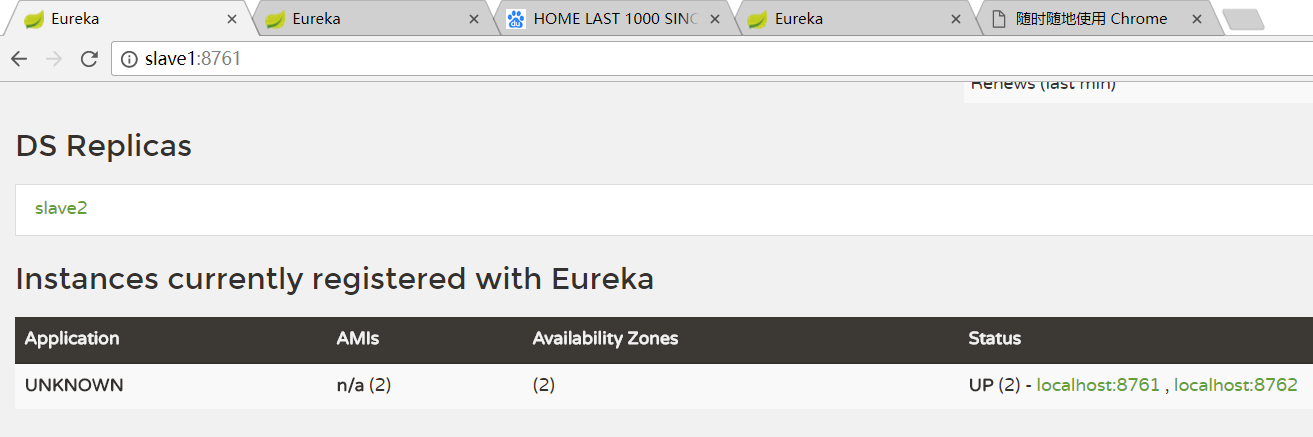
细心的你也许发现主页上的实例的application名称都是UNKOWN,这是因为我们没有再application.yml文件中配置spring.application.name的缘故,如果你配置了,那么它会作为实例的Application名称显示在实例列表里。
启动一个服务的提供者的两个实例
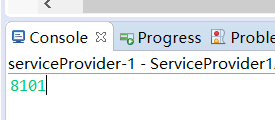
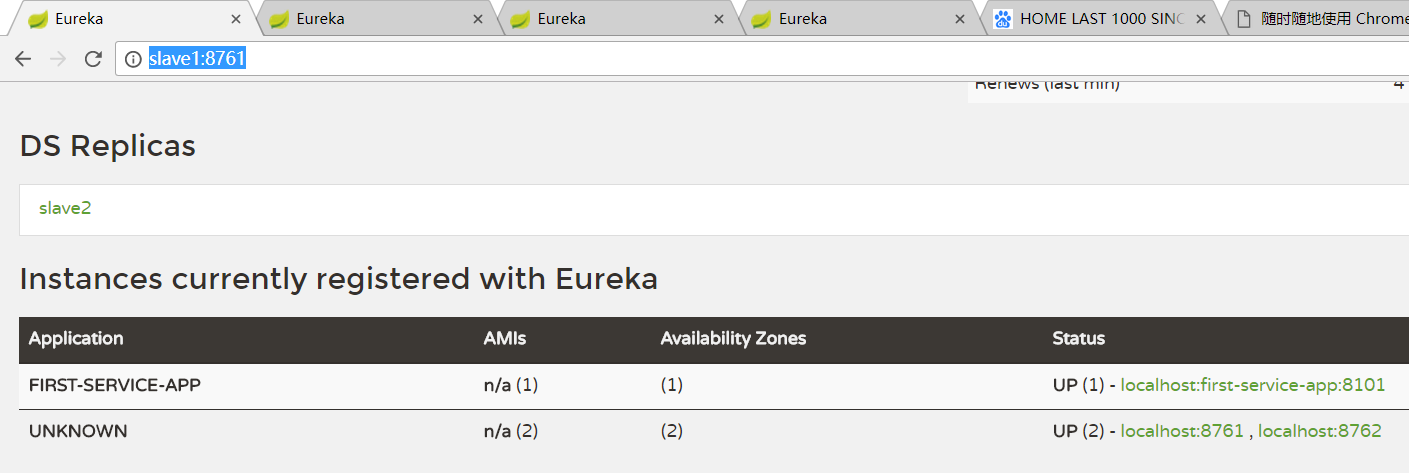
下面我们启动客户端服务提供者一个FIRST-SERVICE-APP,端口输入为8101。
我们刷新两个eureka的主页:http://slave1:8761/
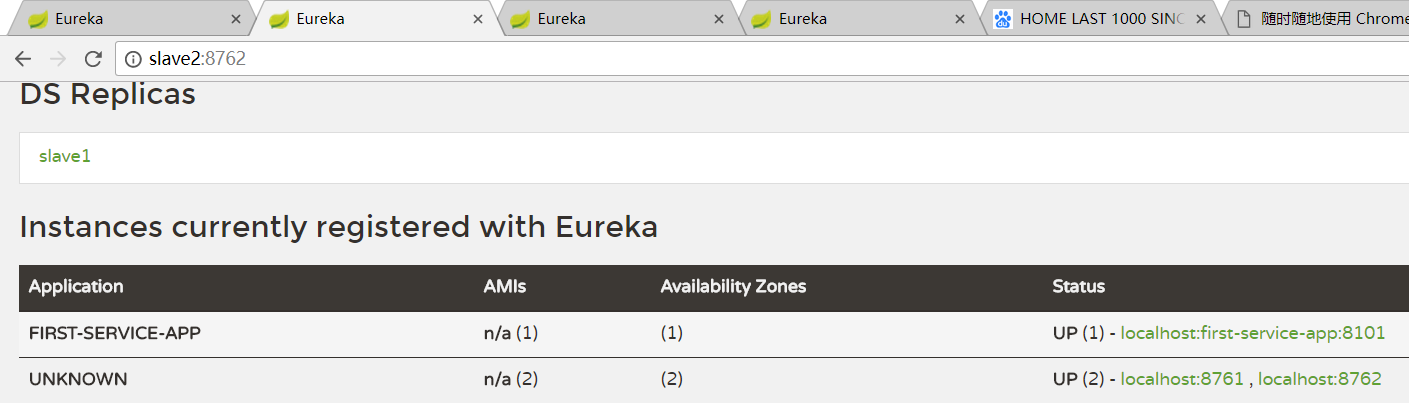
之后我们再启动一个FIRST-SERVICE-APP,端口8102
再次刷新两个eureka服务器实例的主页
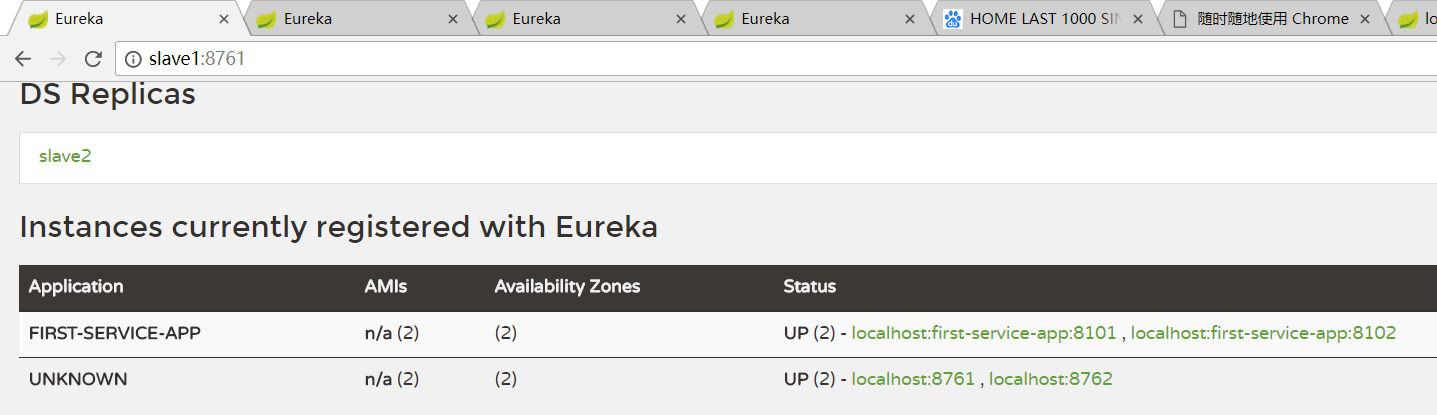
还有
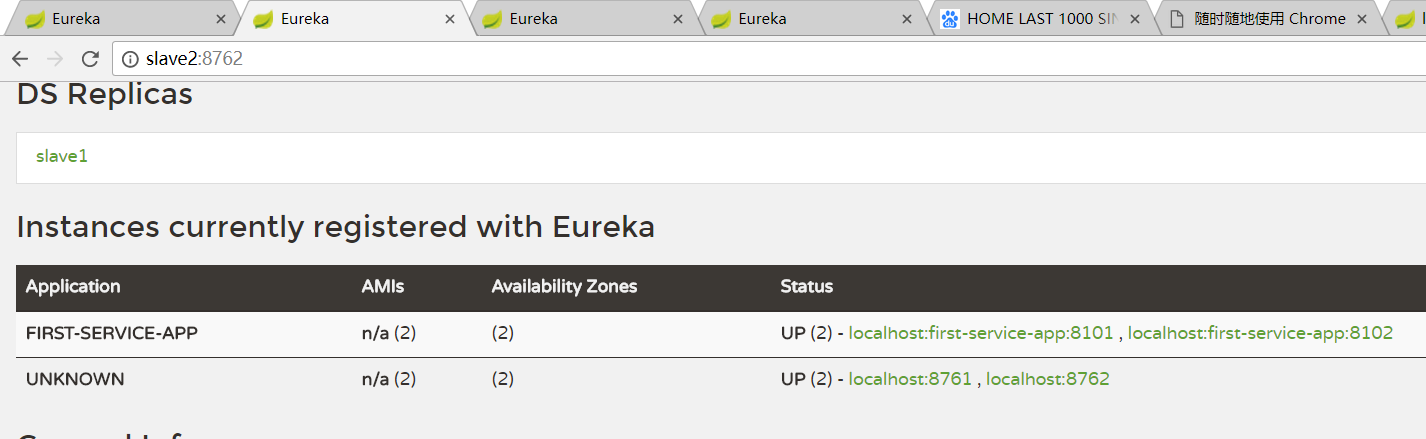
我们发现,与刚才相比,FIRST-SERVICE-APP的那一行的Status字段多了一个IP地址,一看端口正是8102
启动一个实现了负载均衡请求的服务请求者
然后我们启动一个客户端服务请求者应用,请求其对应的url,其controller做的是向服务提供者FIRST-SERVICE-APP请求http://first-service-app/petinfo/findpet
这个我们着重看info这个属性字段,我们填入的是:服务提供者FIRST-SERVICE-APP的控制器处理接收到的请求时把请求的url保留,填入info字段。从这个字段可以看出这个FIRST-SERVICE-APP服务提供者是那台实例的IP。这个IP来自于服务请求者客户端的直接请求,也就是说服务请求者自己在获取了FIRST-SERVICE-APP的服务列表信息之后,得知了FIRST-SERVICE-APP有两台服务器,它自己借助于配置的Ribbon负载均衡框架自己选了请求那台FIRST-SERVICE-APP服务器。

当我们多次请求,发现其请求的服务器是变化的,实现了负载均衡。



